Data Inventory
The Data Inventory feature helps your business track and manage a centralized list of all the data collection, processing, and third-party sharing across your data systems. Maintaining an up to date data inventory is required by some privacy laws, and is generally a best practice to operationalize your business’s privacy program. By maintaining a detailed record of data assets, businesses can track where data resides, how it is used, which data is PII, and who has access to it. This is critical for complying with privacy regulations like GDPR and CCPA. A well-maintained data inventory helps identify potential risks, ensures that data retention policies are followed, and enables organizations to respond effectively to data subject requests and audits, ultimately safeguarding both business operations and customer trust.
Data Groups
From the Data Mapping page, select the dropdown labeled Data Inventory. This is the screen shown below.

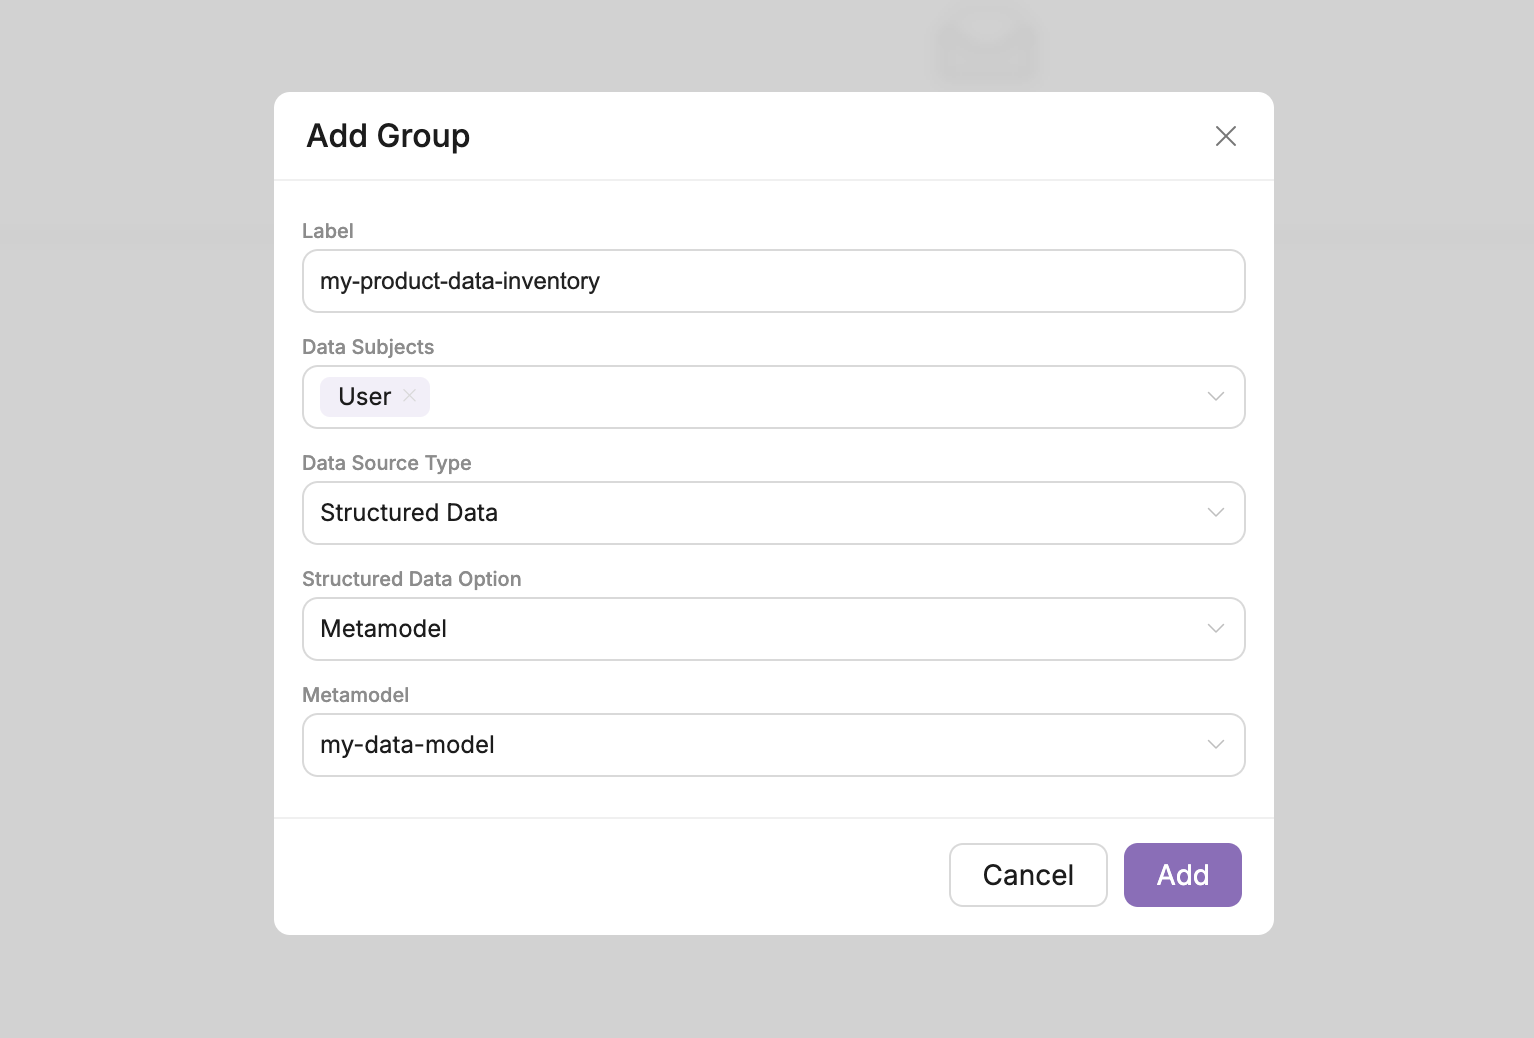
Select the button in the top right corner called Add Group. This will pull up a widnow like the one below. Fill out the information appropriately. As you can see below, I gave the group a name, selected my data subjects, and connected my meta model.

Once you're done just select Create. And that's it! You've created a data group. Your dashboard should look like the one below. Next, we'll be creating Data Assets.

Data Assets
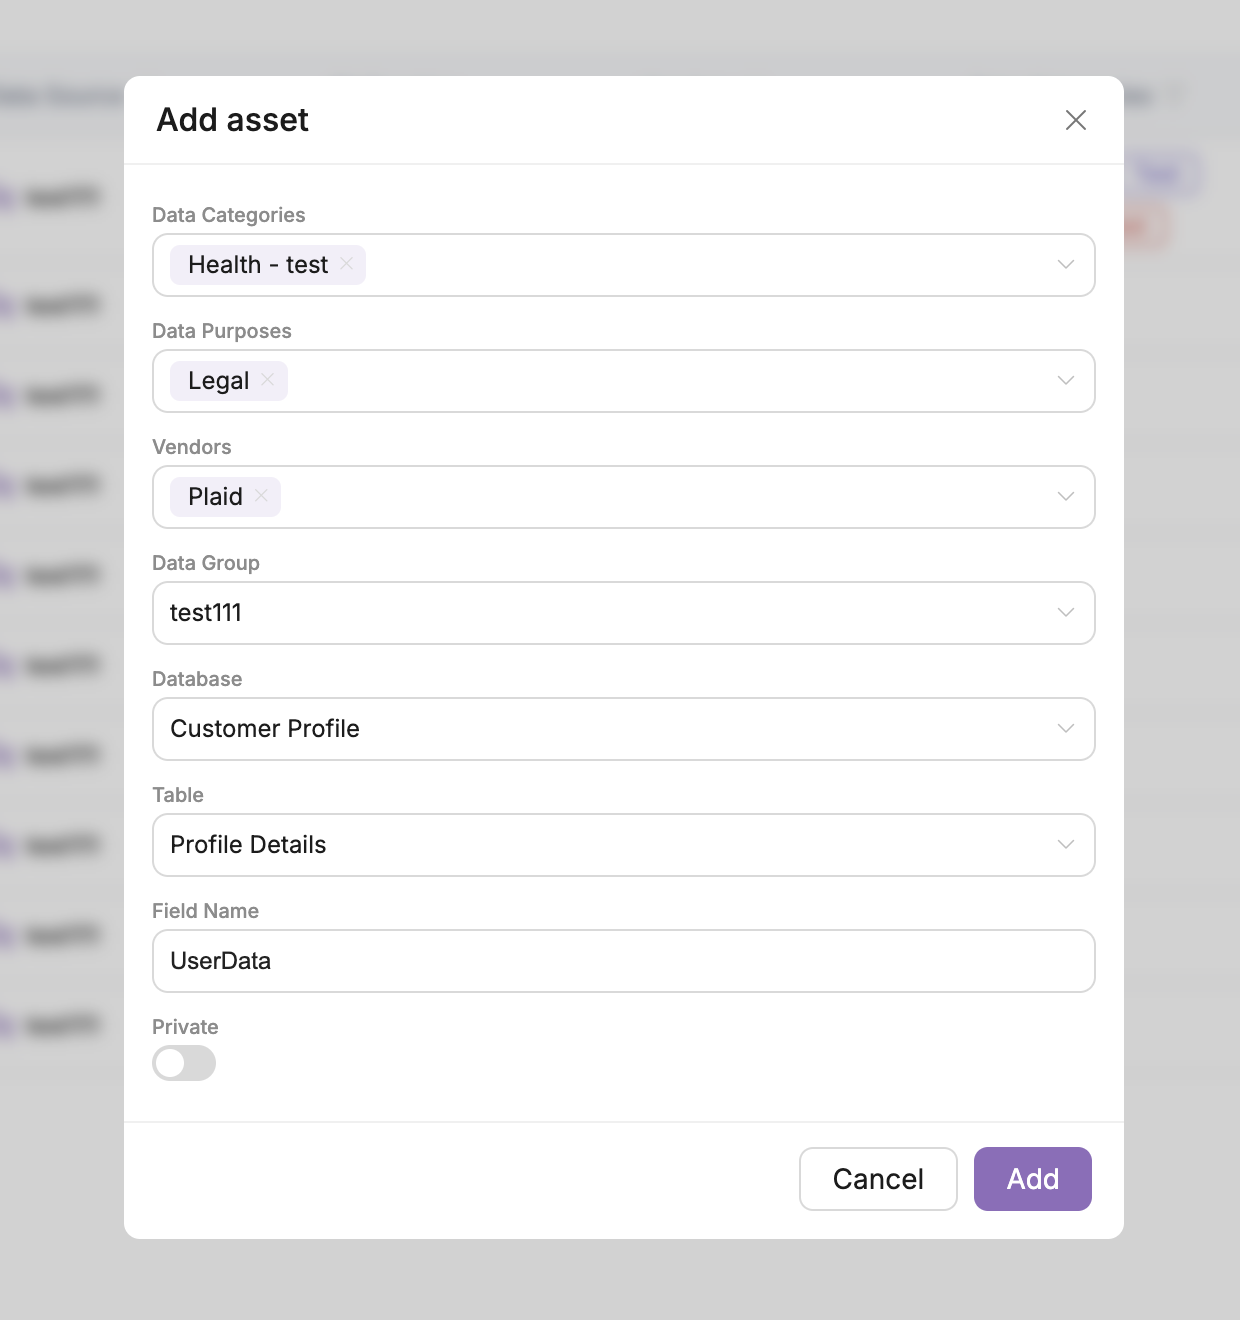
To create a Data Asset, from the Data Inventory page, notice the tab options at the top of the page and select Data Assets. From this page, select Add Asset in the top righ corner. This will bring up a window like the one shown below. As you fill out the fields, you will be prompted to connect your data asset to an existing Data Group. If you have not created a Data Group, follow the steps at the top of this page. Once you've entered in all of the fields, select the Add button.

Now you should see your new Data Asset on the dashboard. Here is an example of a dashboard with a few Data Assets.

Data Categories
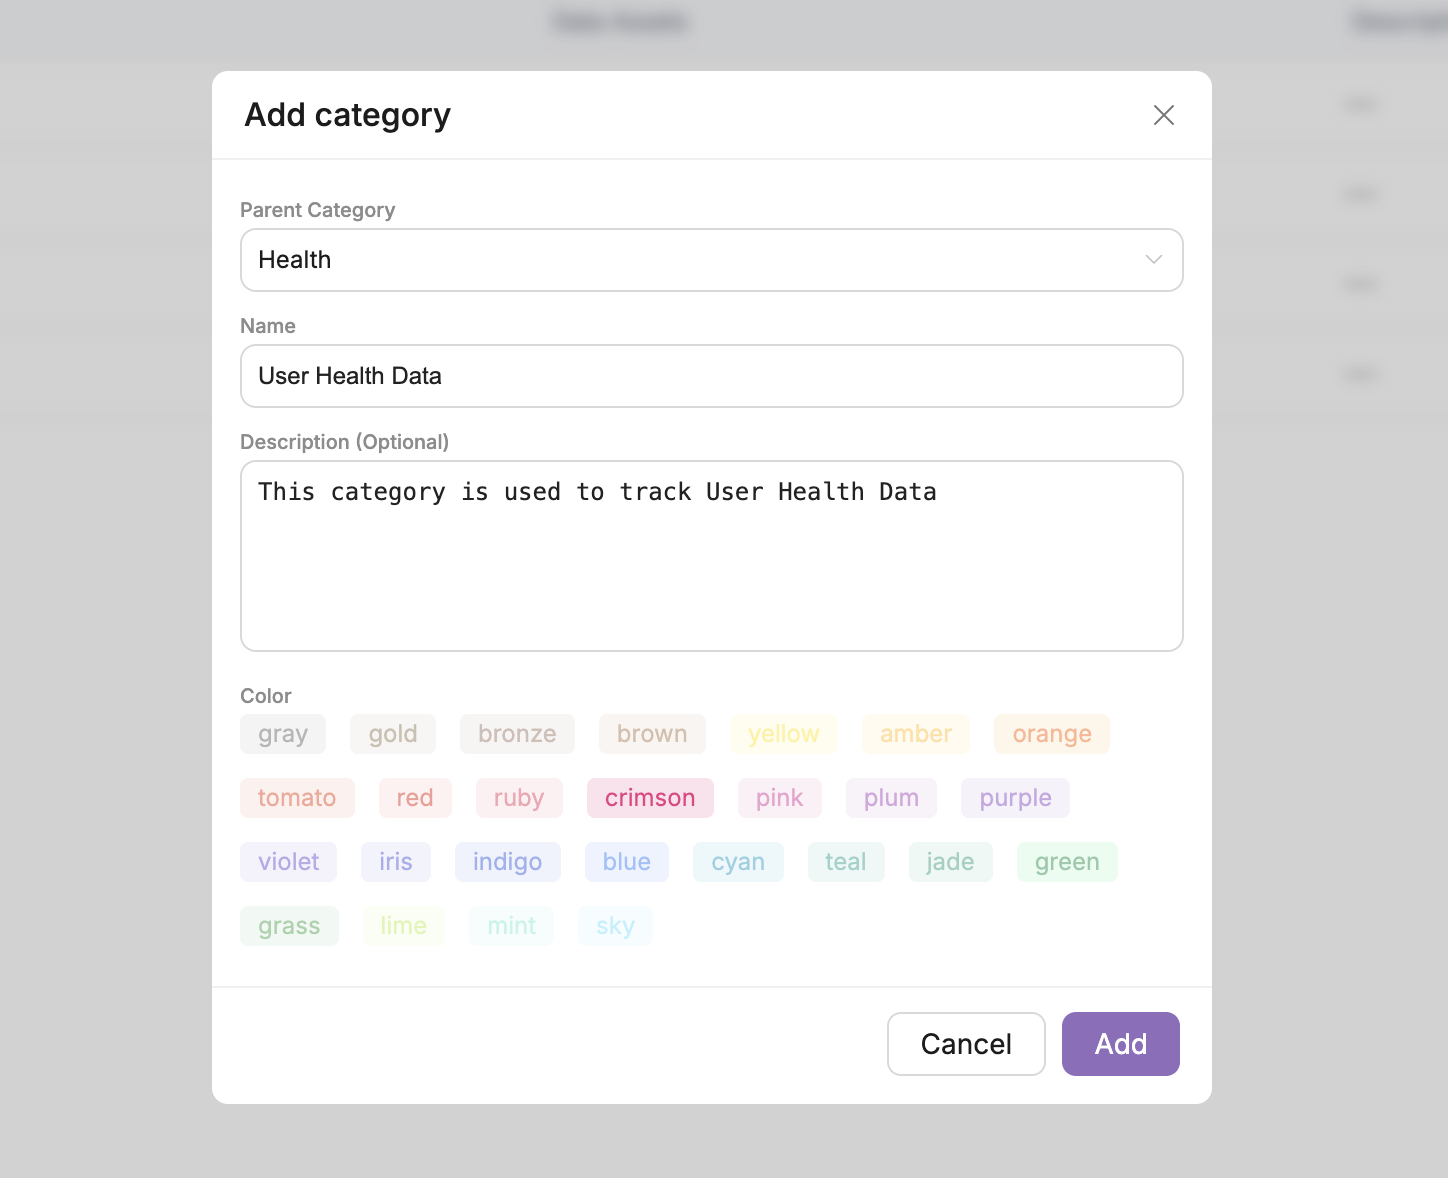
Data Categories can be created on the Data Inventory page. Just click on the Data Categories tab at the top of the screen. From this page, you should see a button at the top right corner of the page titled Add Category. Select this button. You'll be presented with a window like the one below. Just select a Parent Category, give the Category a name and description, and select a color.

Below is an example of a dashboard with a few Data Categories.

Purpose of Processing
Purpose of Processing identifies the nature of your processing activities relative to specific data assets or data groups. Because many privacy laws impose limitations on allowable data processing, it is important to tag your data appropriately in order to manage applicable limitations.
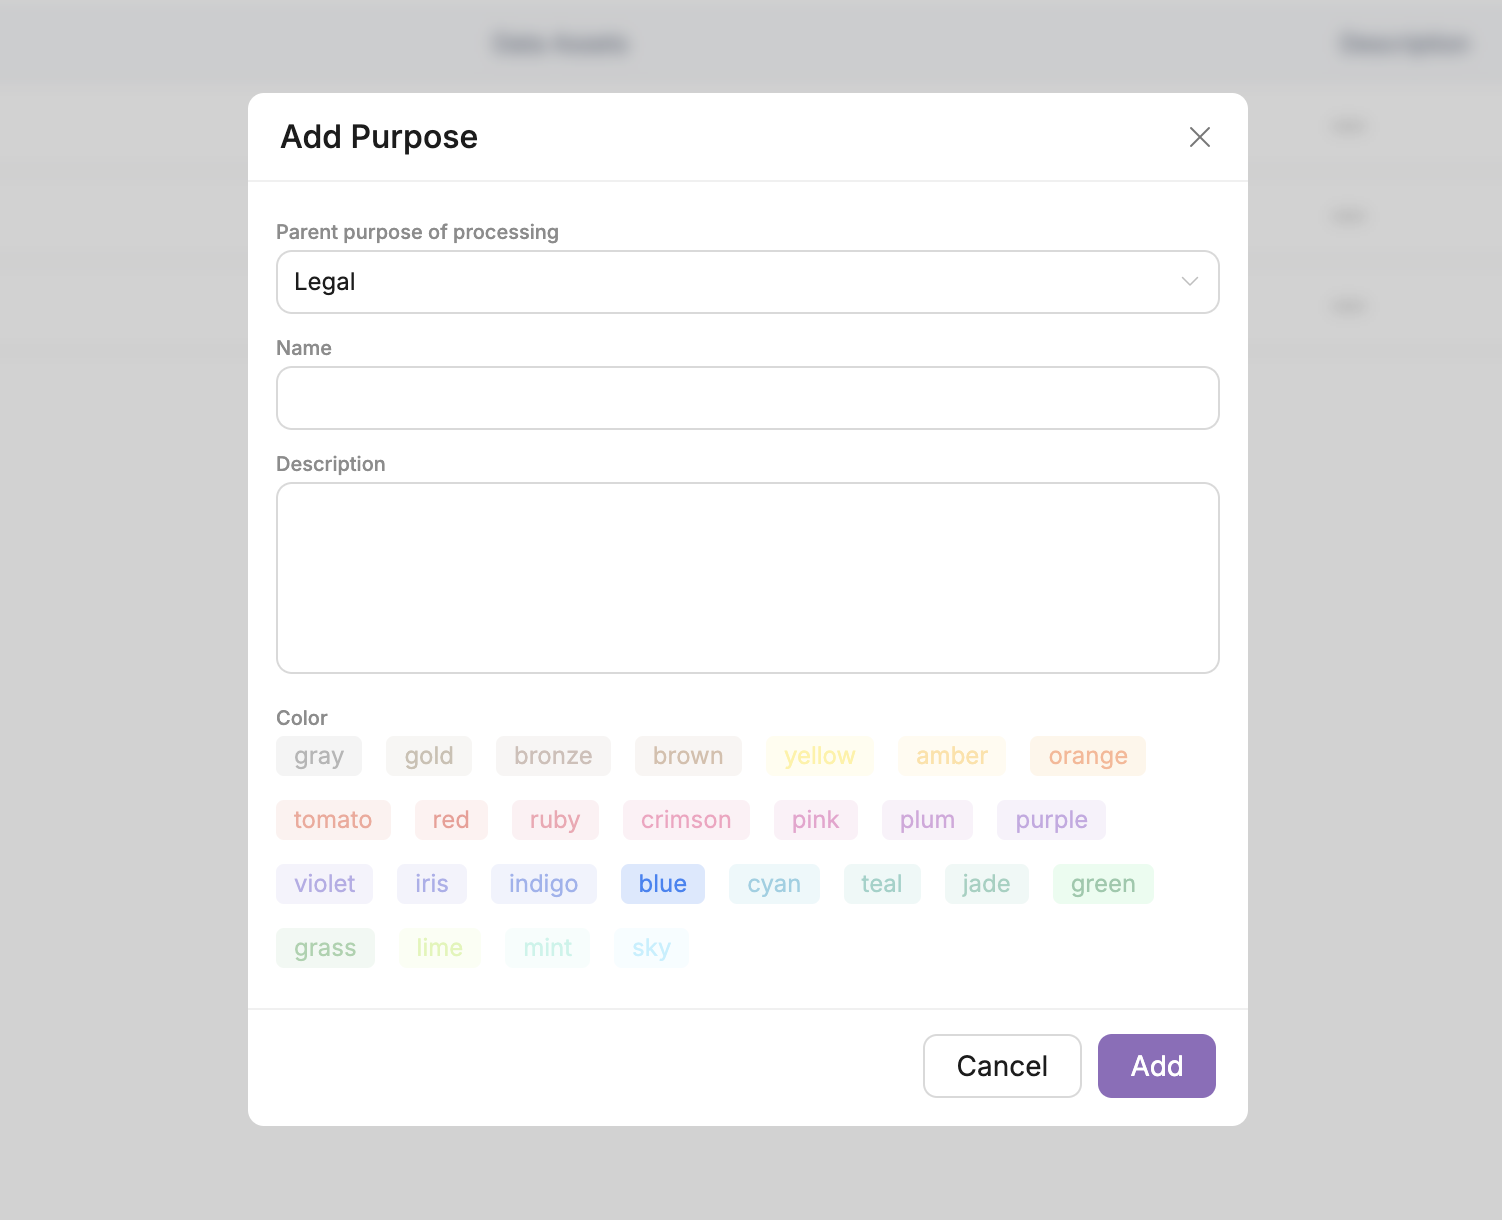
To create a Purpose of Processing record, from the Data Inventory page, notice the tab options at the top of the page and select Purpose of Processing. From this page, select Add Purpose in the top righ corner. This will bring up a window like the one shown below. Give it a name, purpose, and color. Once you're done select the Add button.

Here is an example of a few different purpose of processing entries.
