Consent Management
A consent widget for Data Subject Access Requests (DSAR) and Opt In / Opt Out preferences is essential because it empowers users to exercise control over their personal data, a core requirement of data privacy regulations like GDPR and CCPA. The widget ensures that organizations can efficiently handle DSARs, allowing users to access, modify, or delete their personal data in compliance with legal obligations. It also provides a simple interface for users to manage their consent preferences, whether opting in or out of data collection and marketing communications.
The Consent widget is something you will deploy on your website or application. It gives your users the ability to set their preferences with respect to how their personal data is managed. In this section, we'll be reviewing how to create and deploy the widget to your website or application. For more information about how to handle Preference Requests, visit the Privacy Requests section.
Create a consent widget
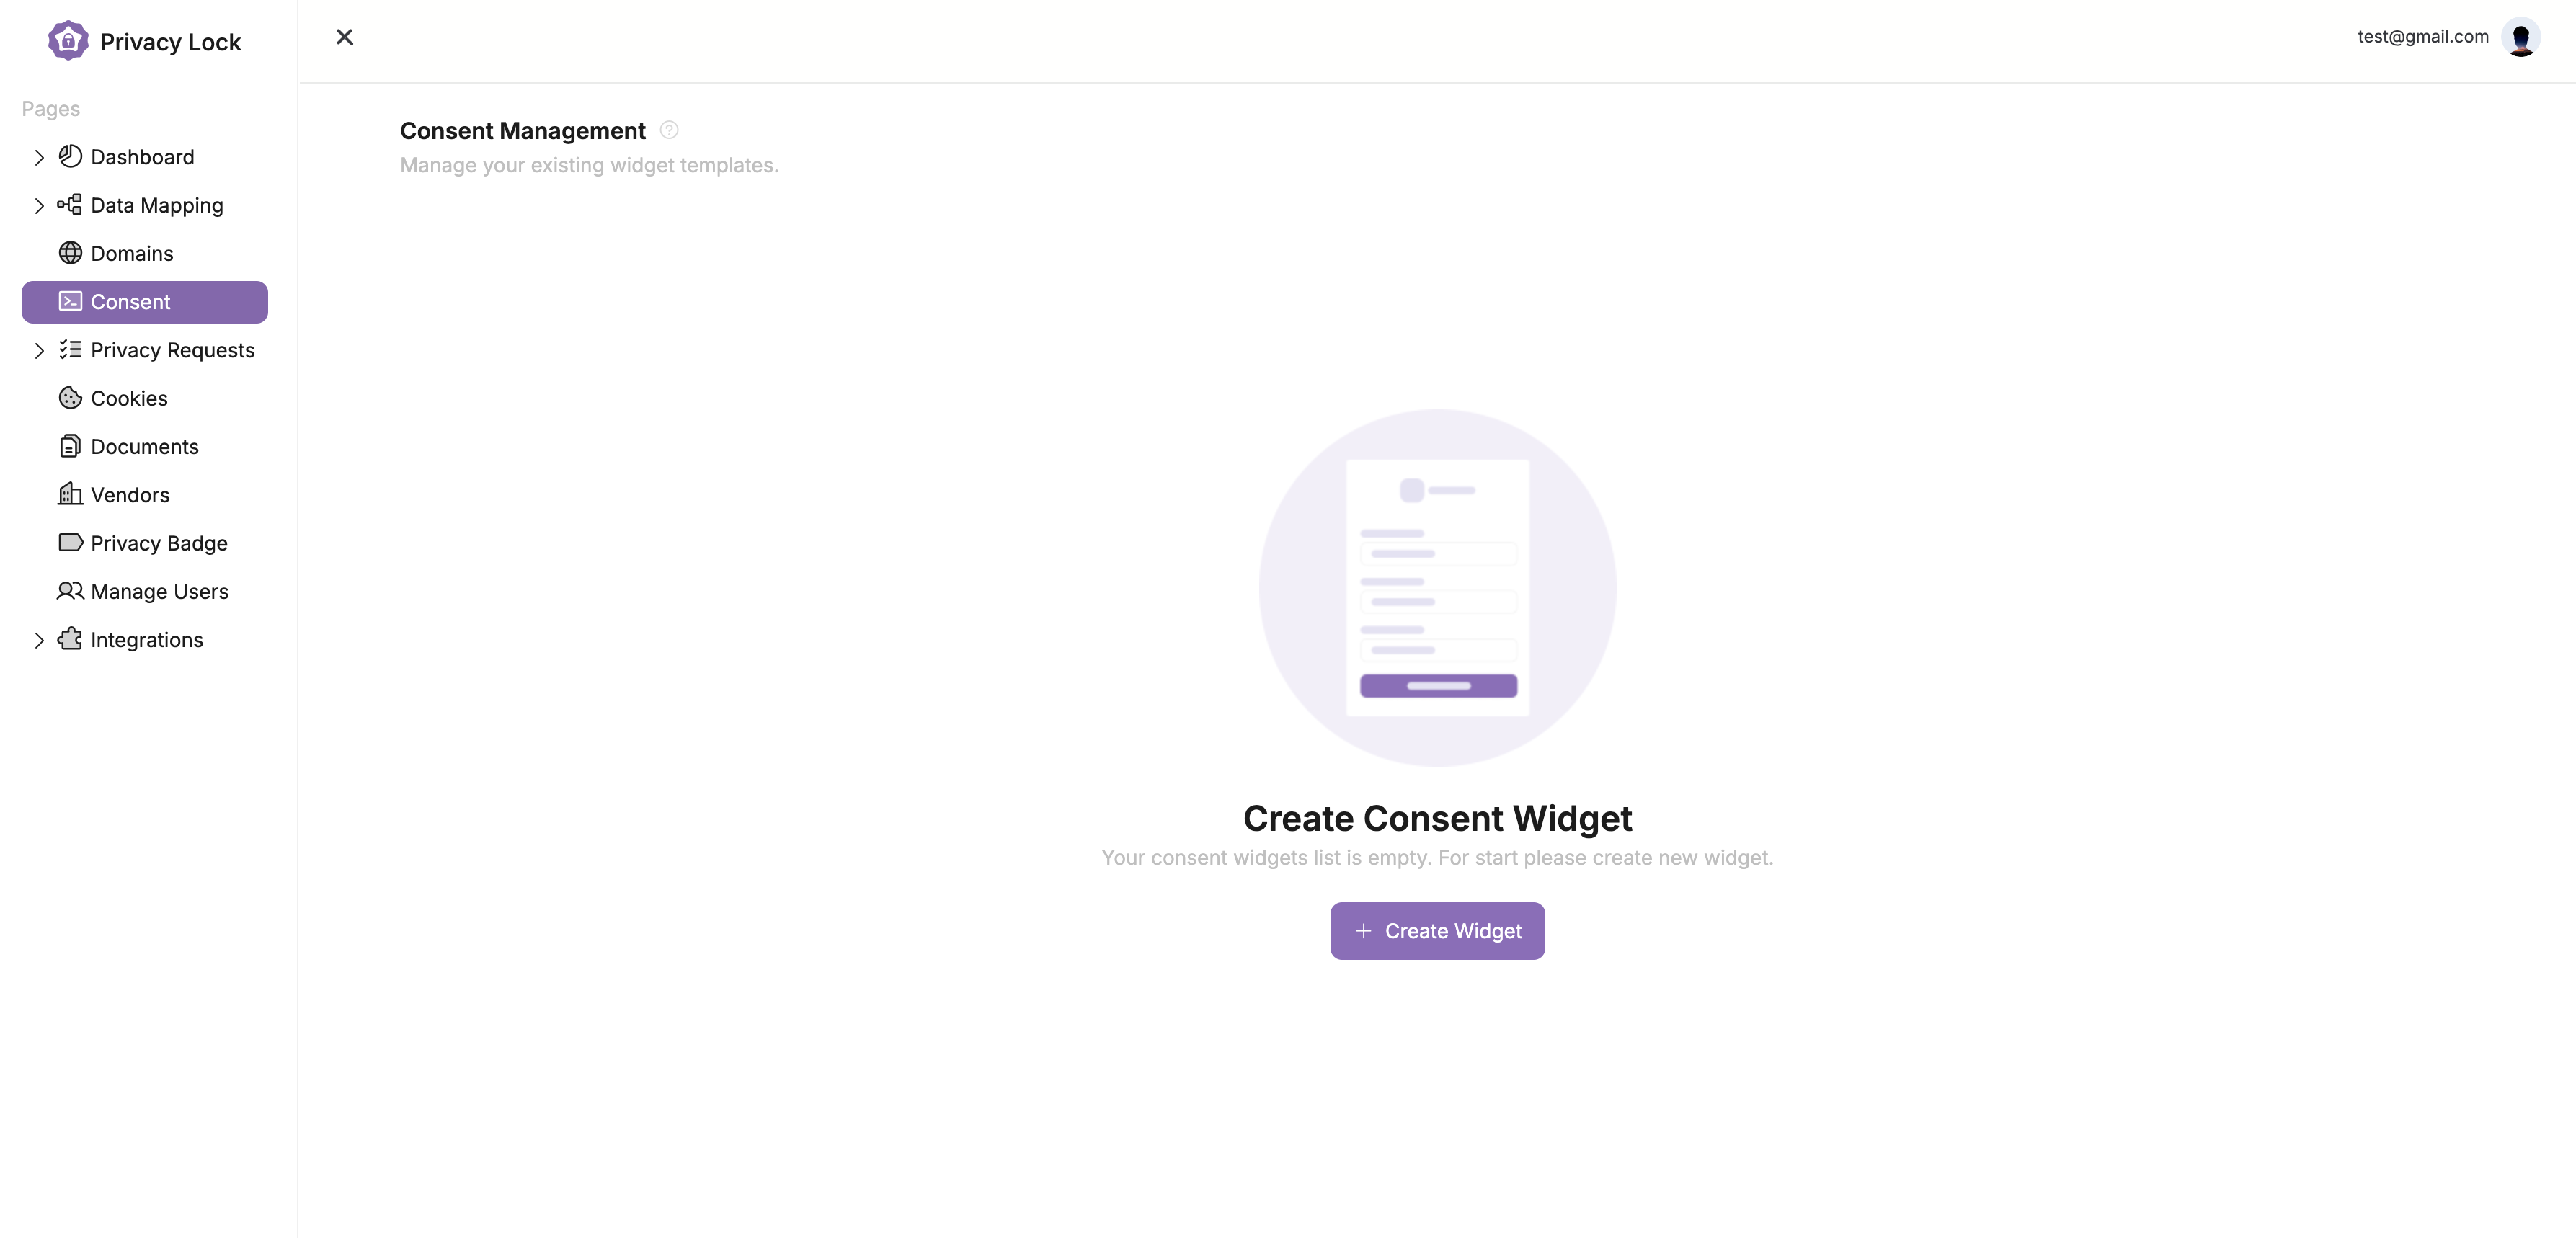
From the Privacy Lock dashboard, navigate to the Consent tab on the left side of the page. This should bring you to a page like the one below. Then select the Create Widget button.
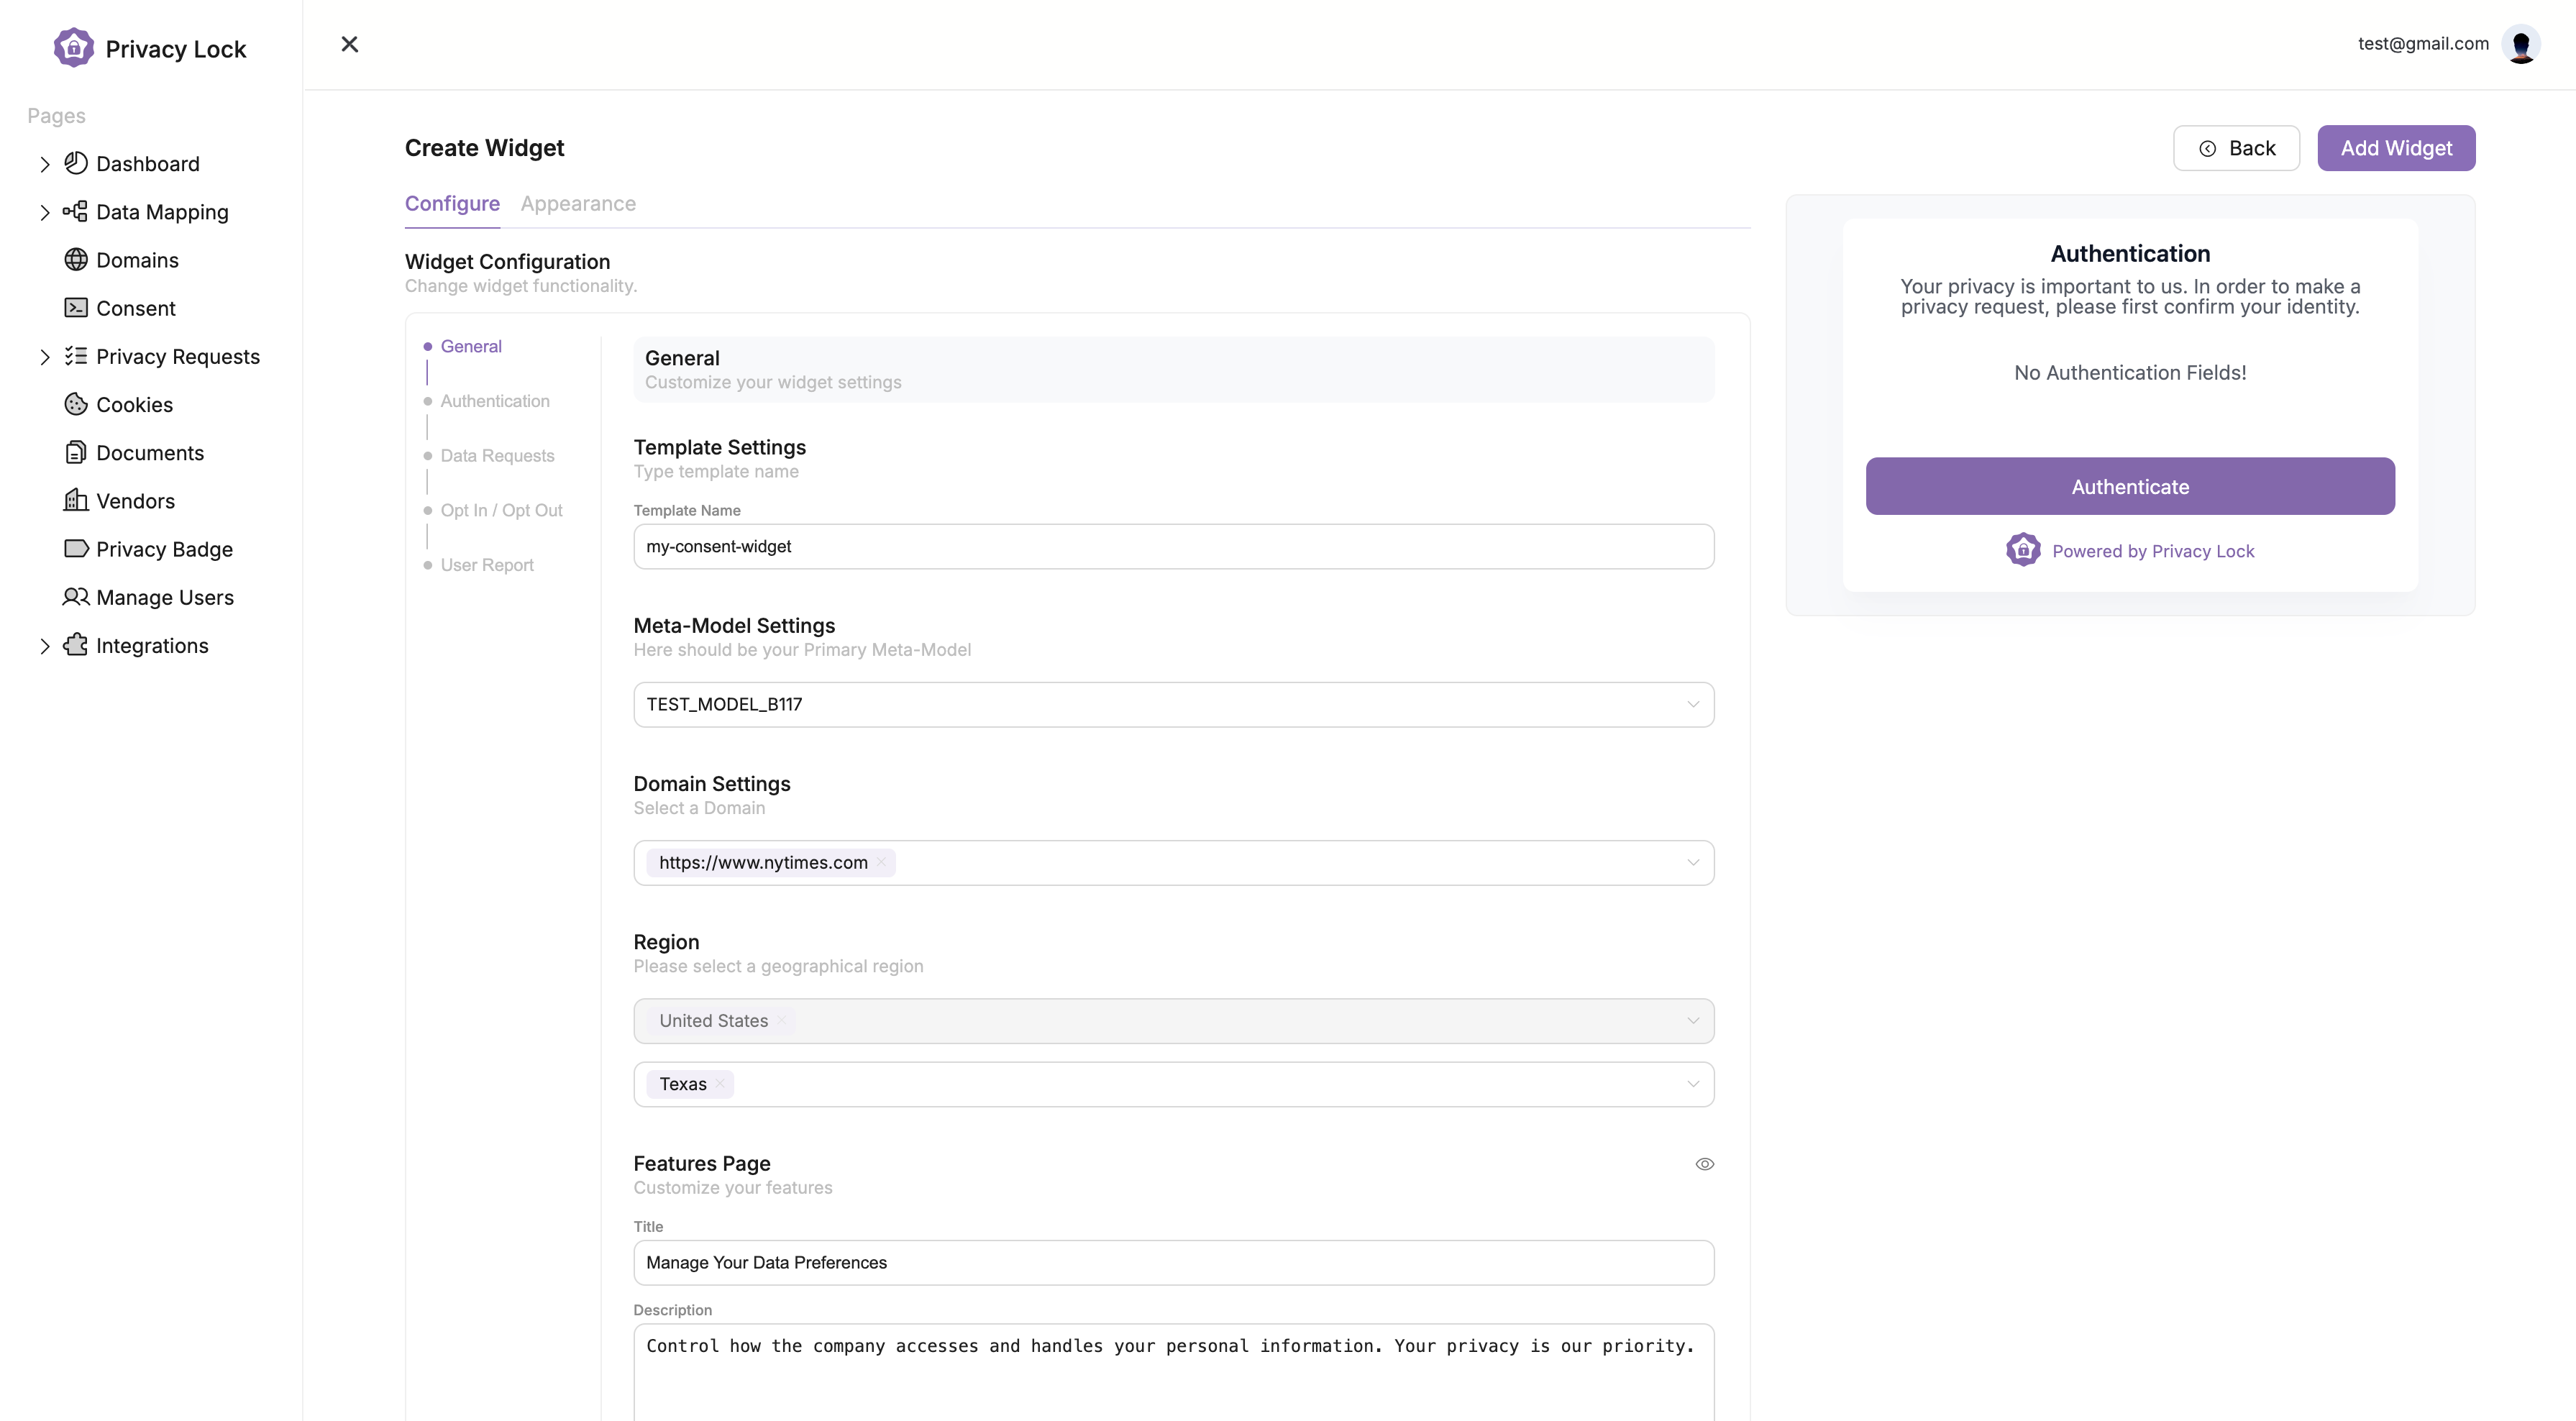
Now that you have opened the widget edditor, you will see a window like the one below. To create the widget, we will need to customize our settings. In this section, you are being prompted to give the widget a name, connect it to a Data Model, select a Domain, and a Region. Additionally, you can adjust the language used within the widget.
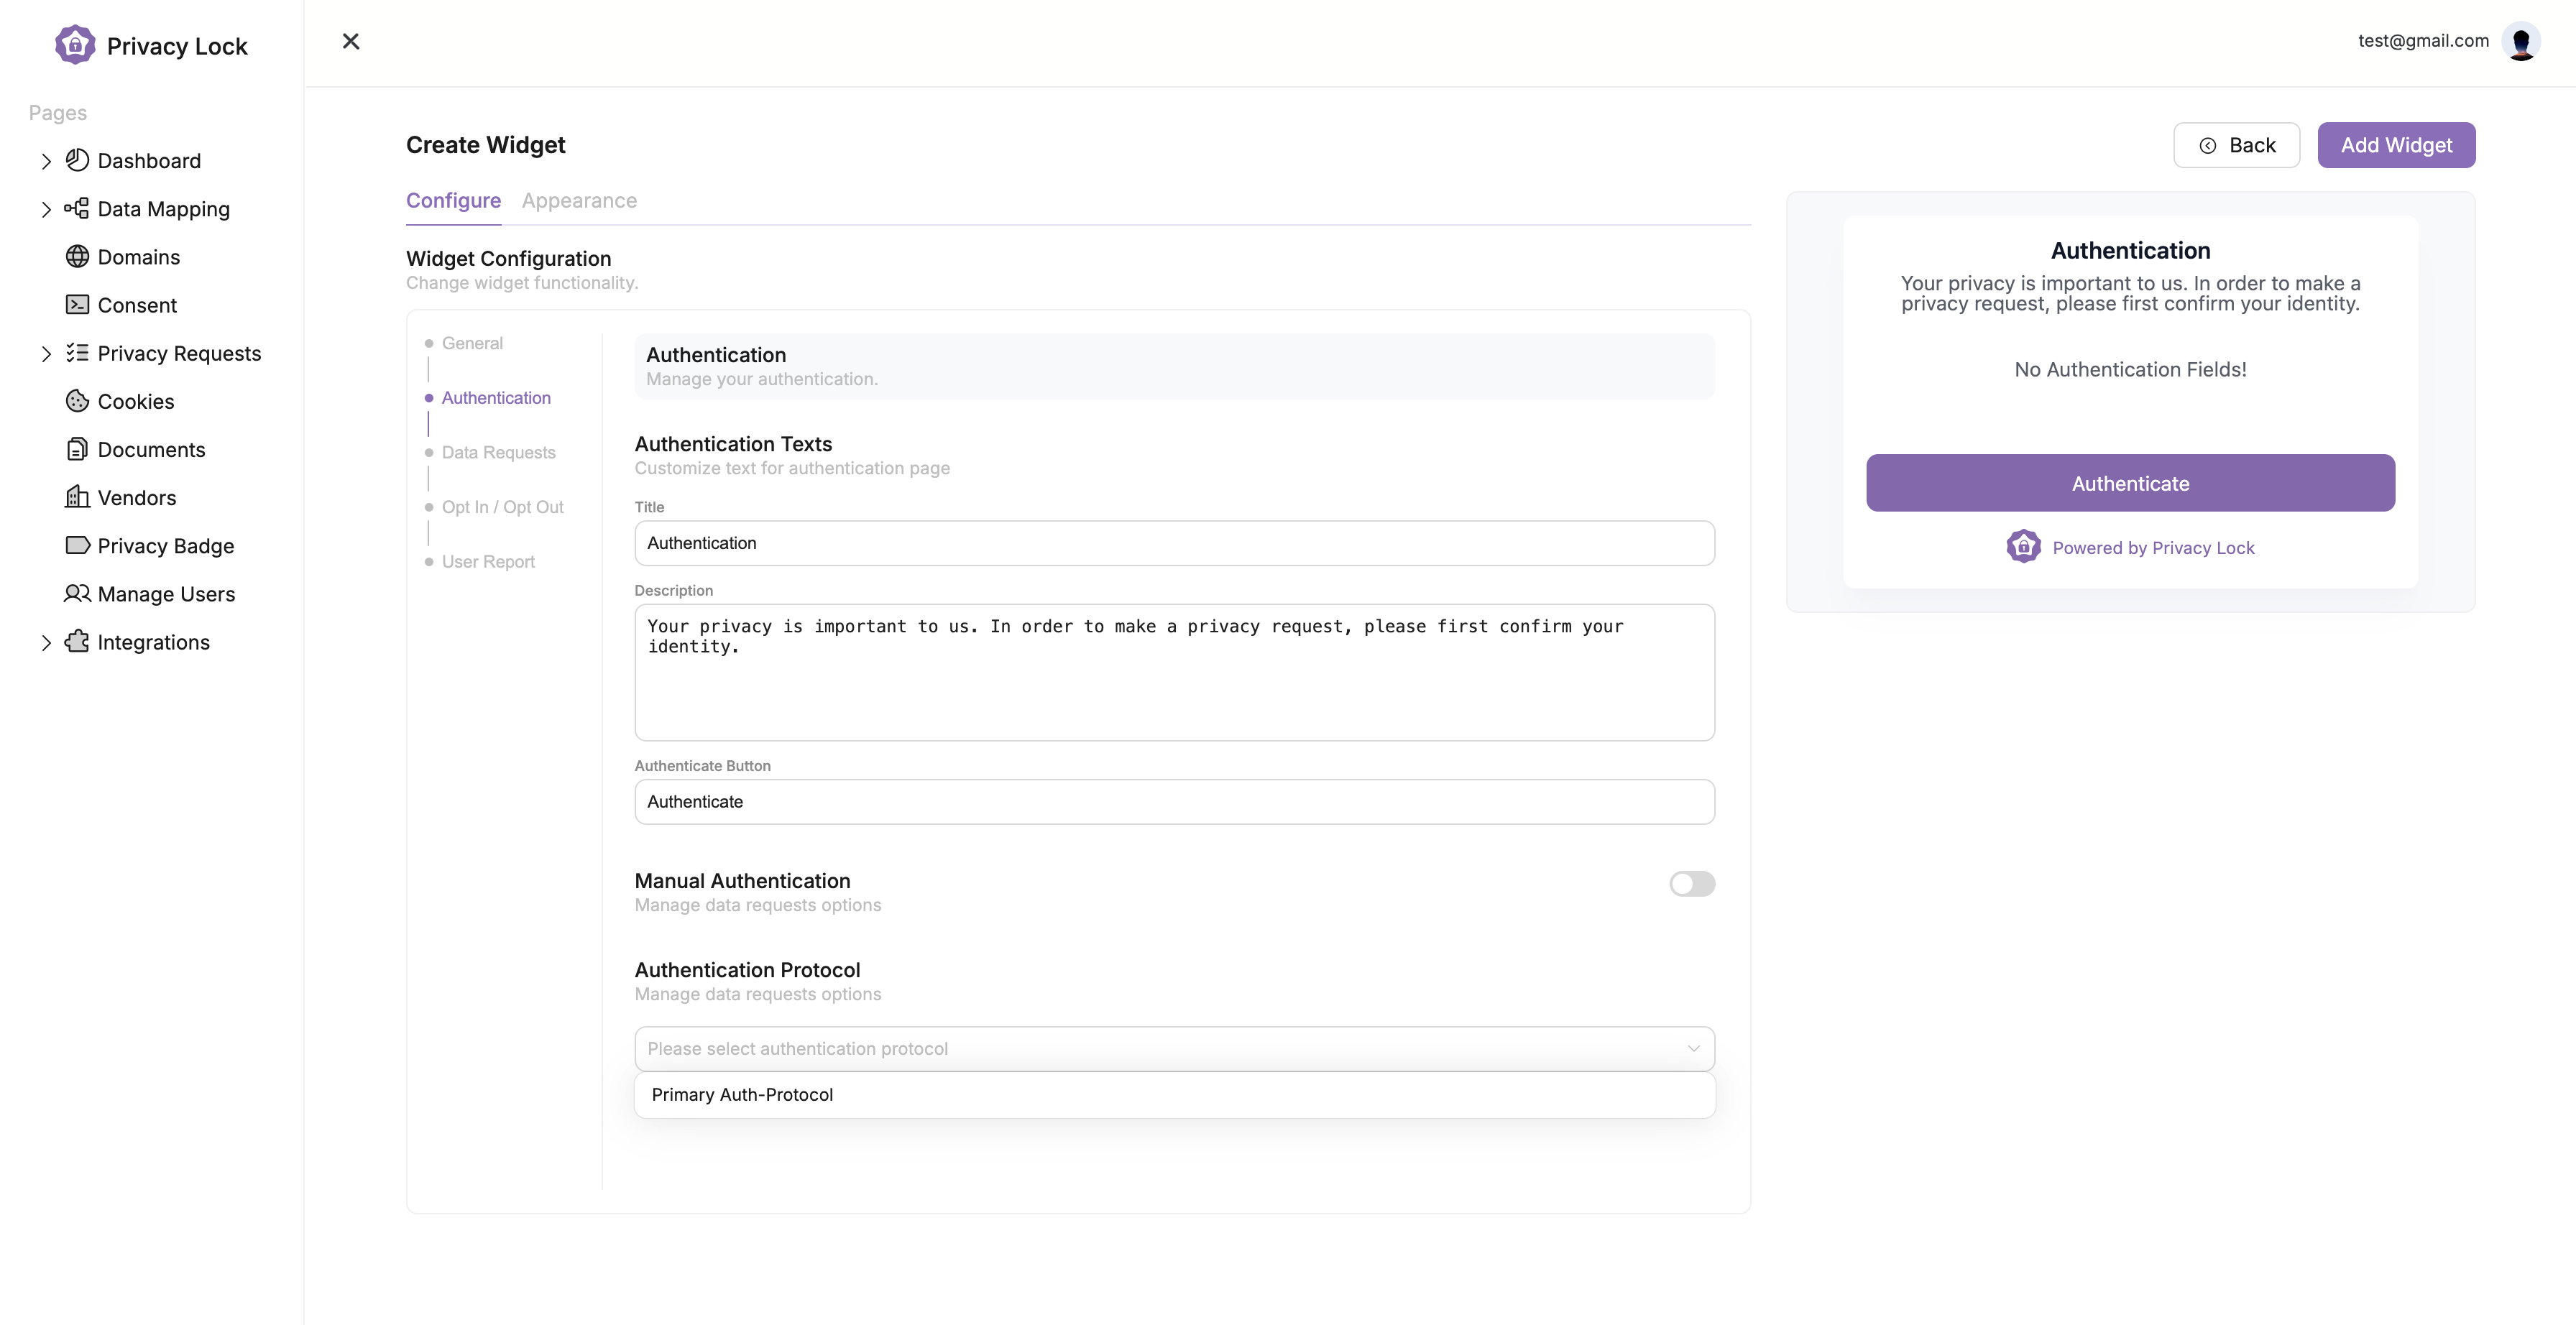
In the next section, titled Authentication, we must specify how the user will be authenticated from the widget. If you have an Authentication protocol in place, select it in the dropdown. Alternatively, if you do not have a protocol in place, you can select Manual Authentication and continue to the next step. The difference between the two is primairly what fields are being authenticated.
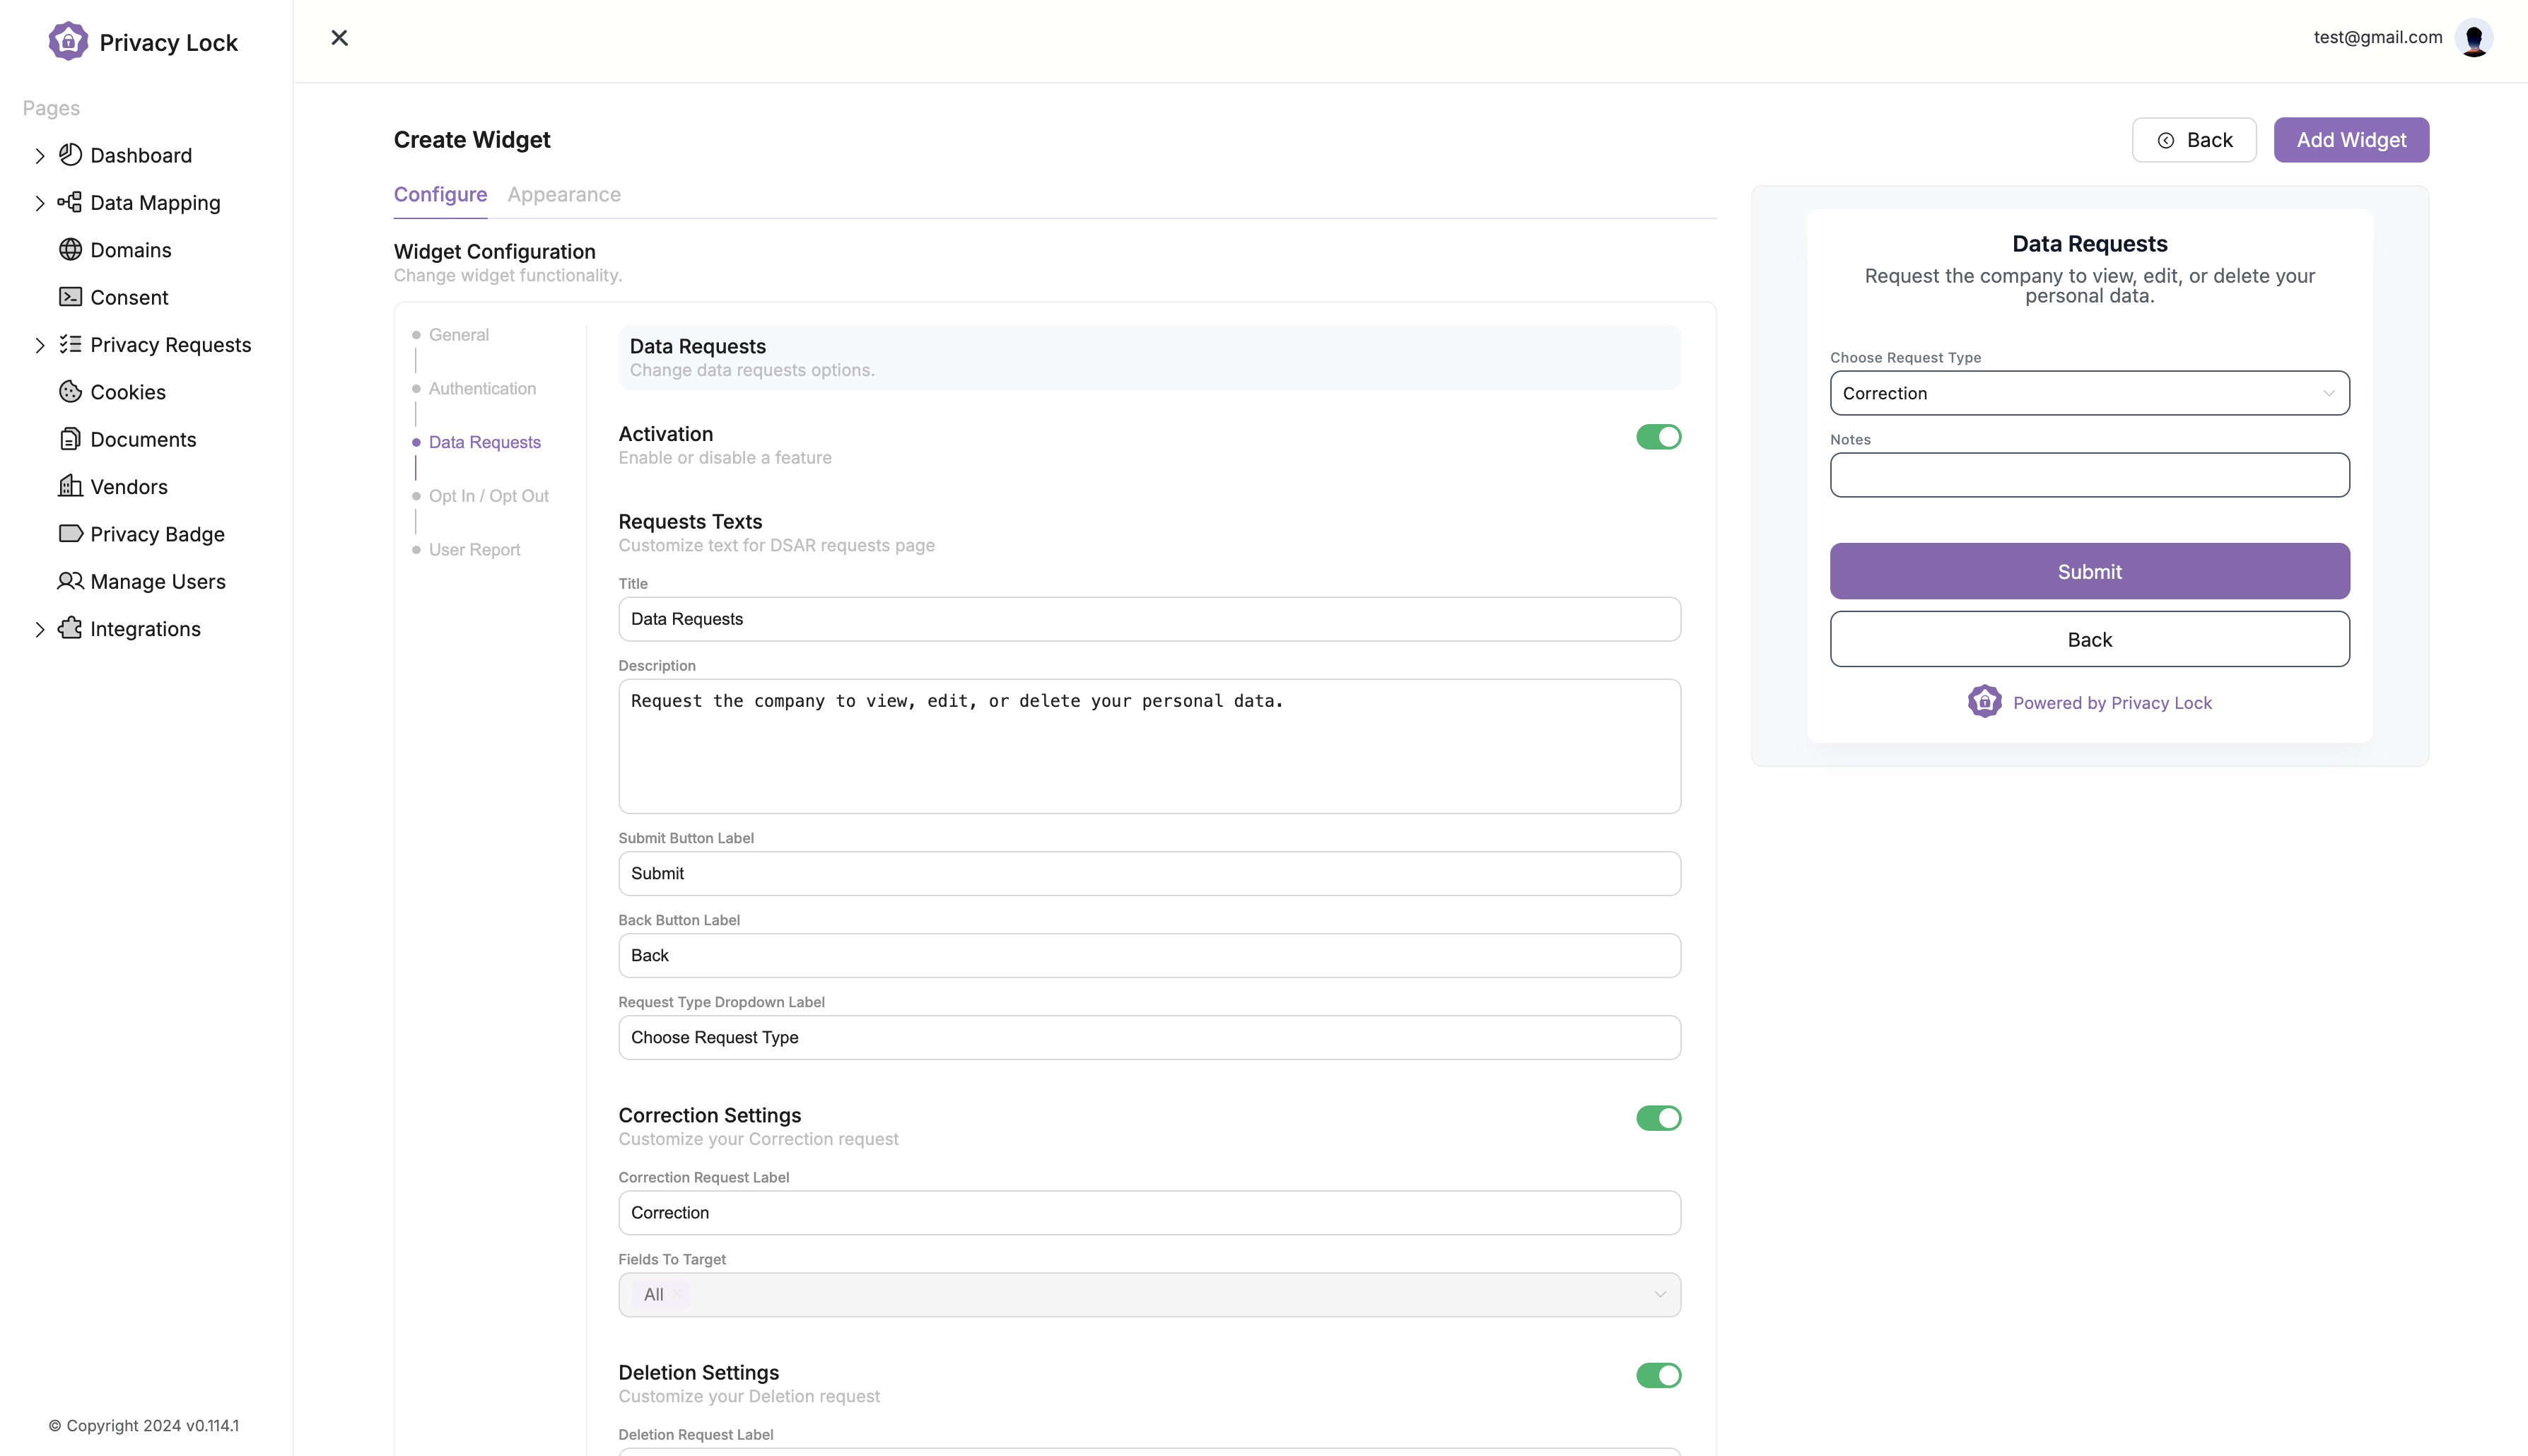
Now that Authentication is in place, continue to the Data Requests settings as seen below. This is where you can customize the language and settings used in the Data Subject Access Request portion of the widget.
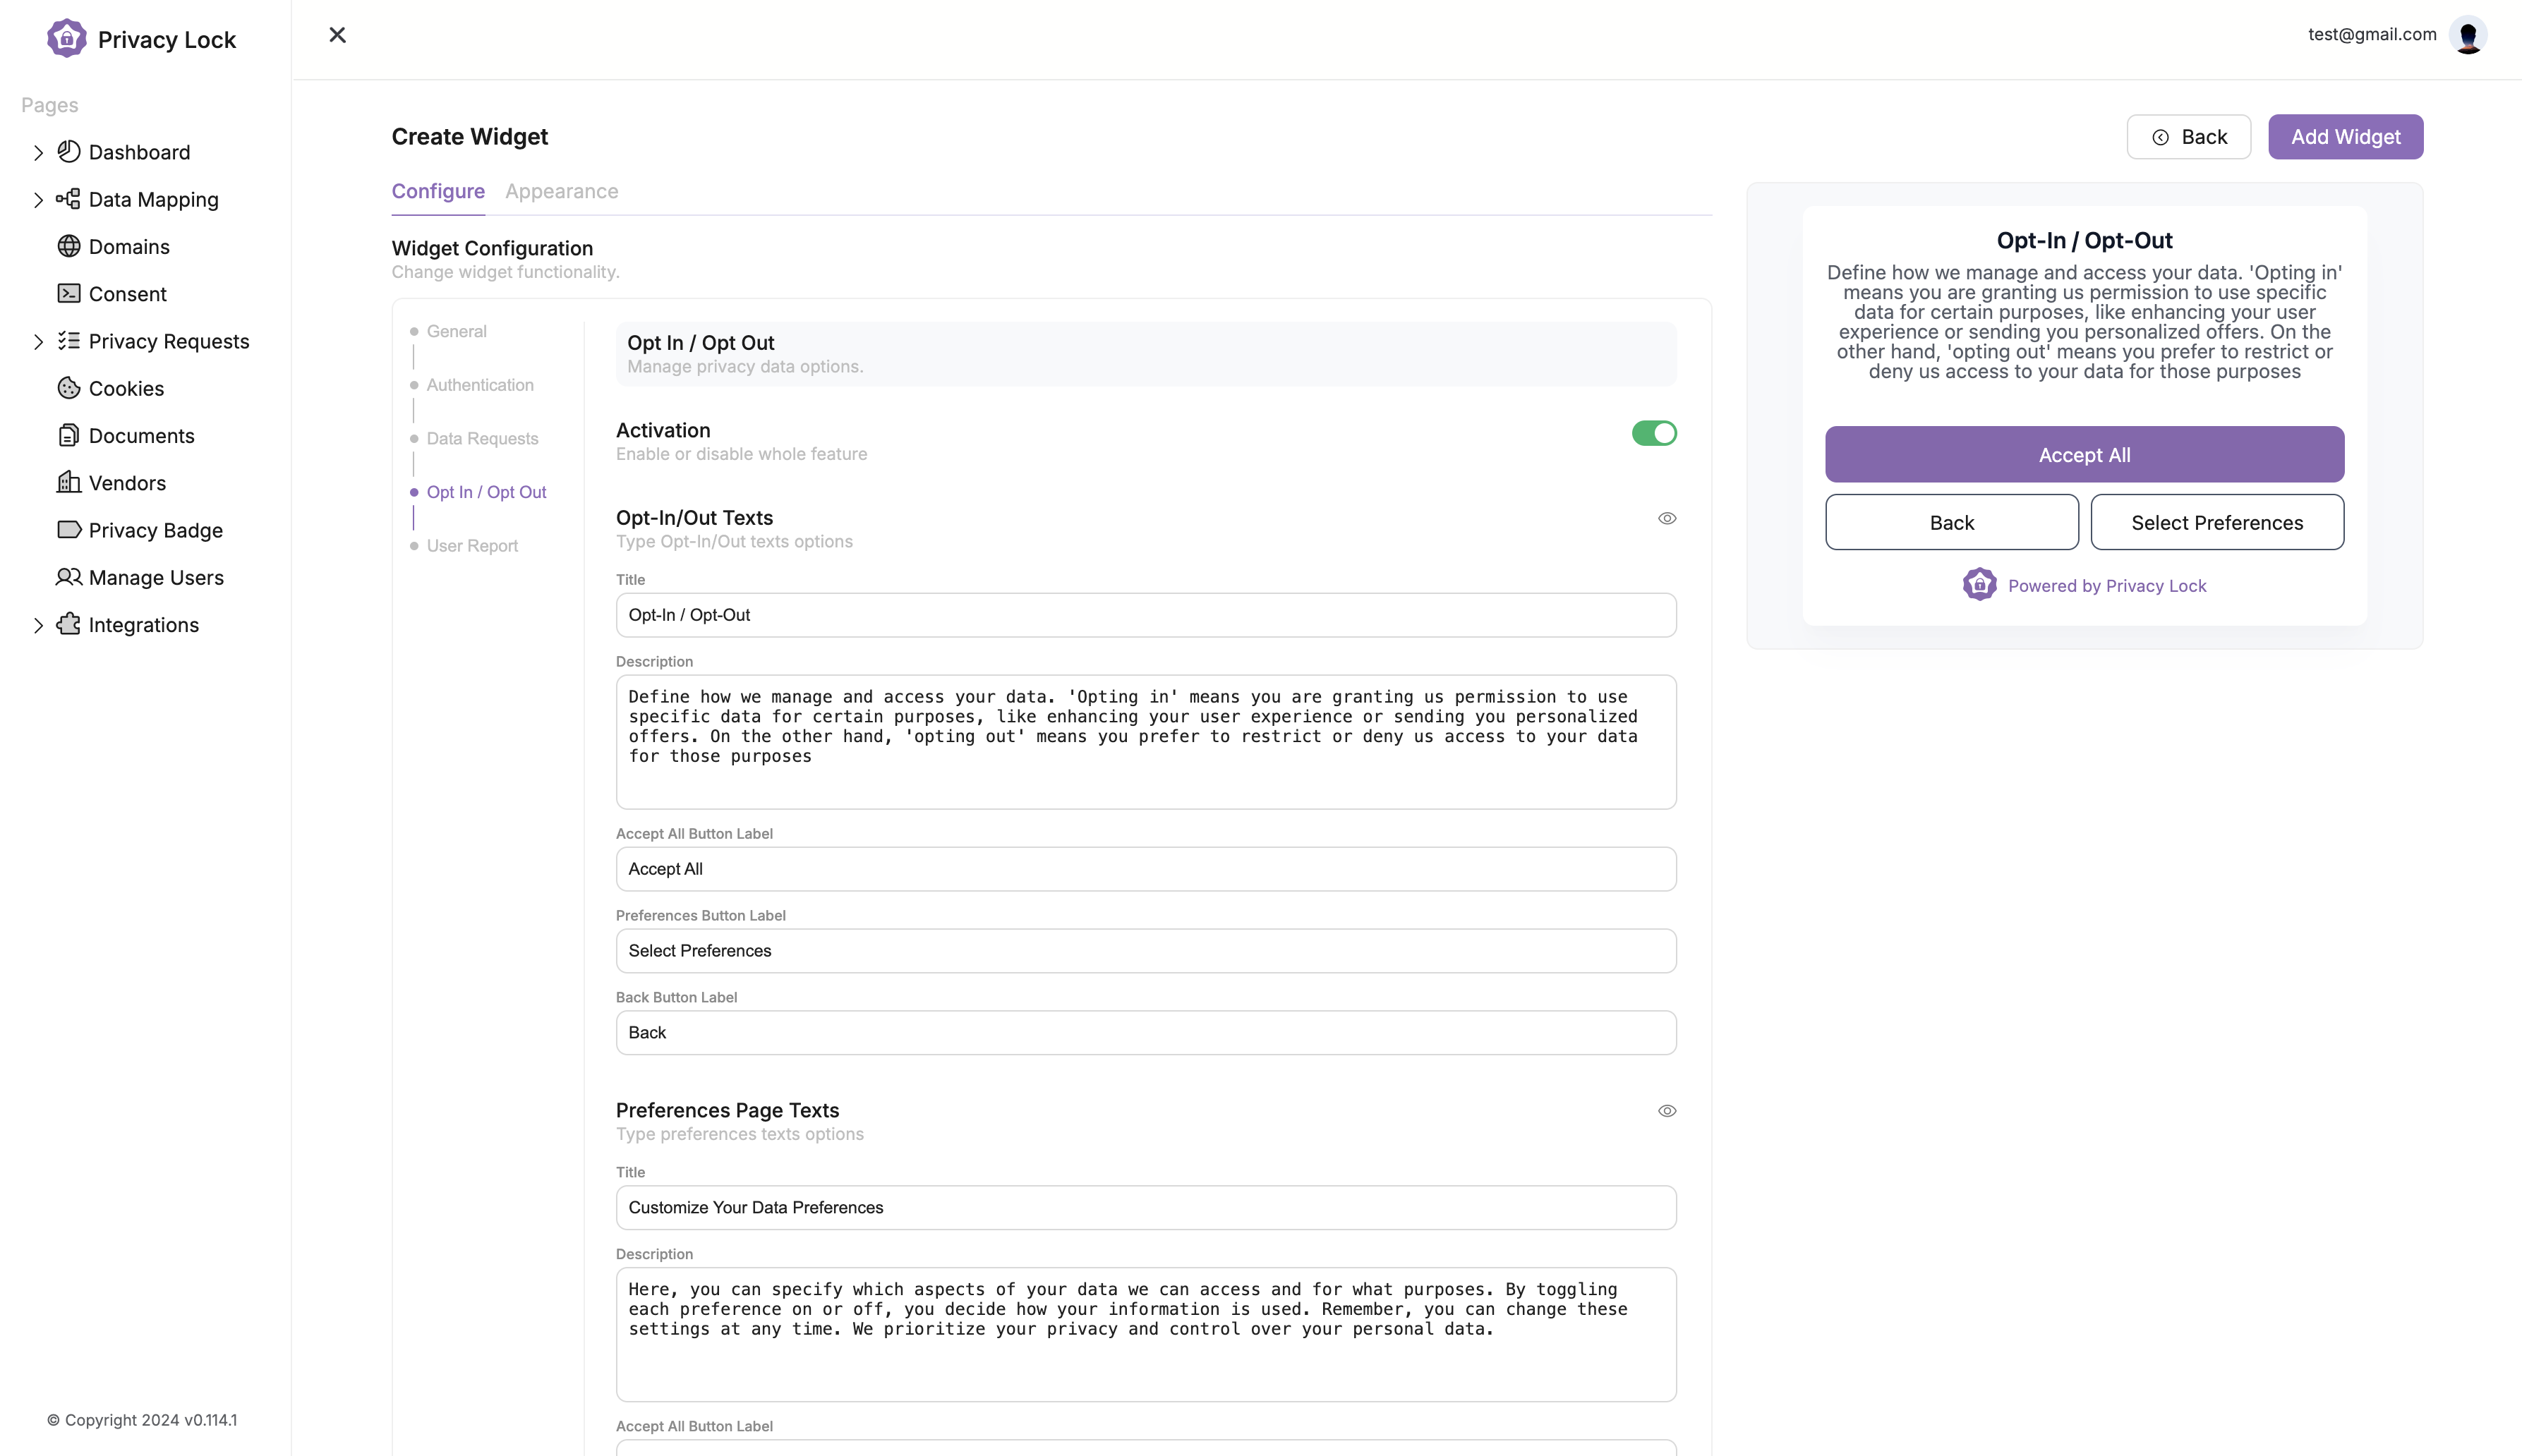
Likewise, the Opt In / Opt Out section allows you to adjust the language and settings for the widget with respect to Option Requests. Simply enter in the appropriate settings for your platform and continue to the next step.
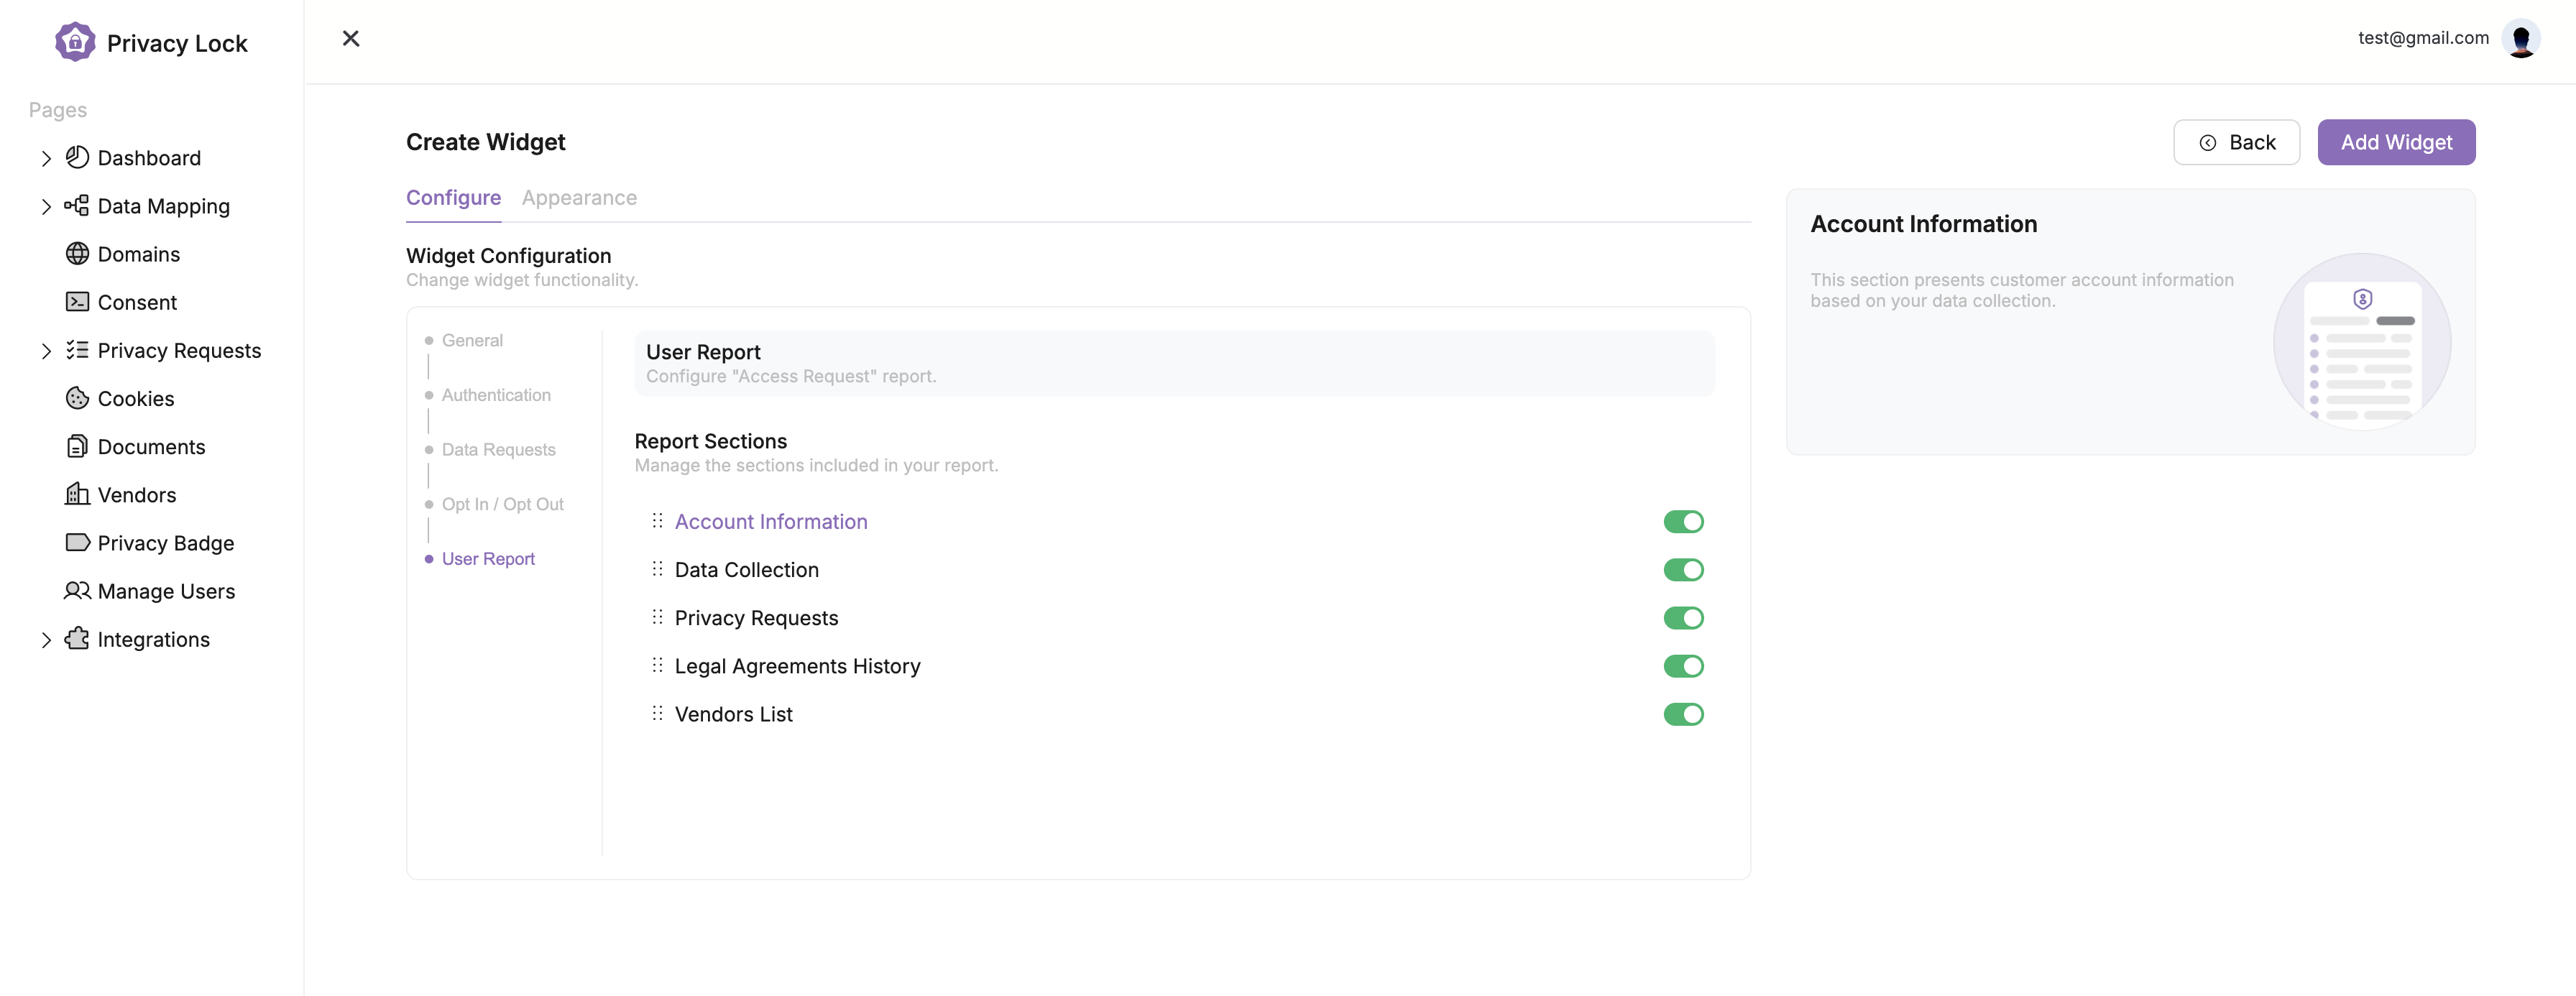
Finally, we have the User Report settings. These settings determine what the user will see when they recieve their Data Privacy Report.
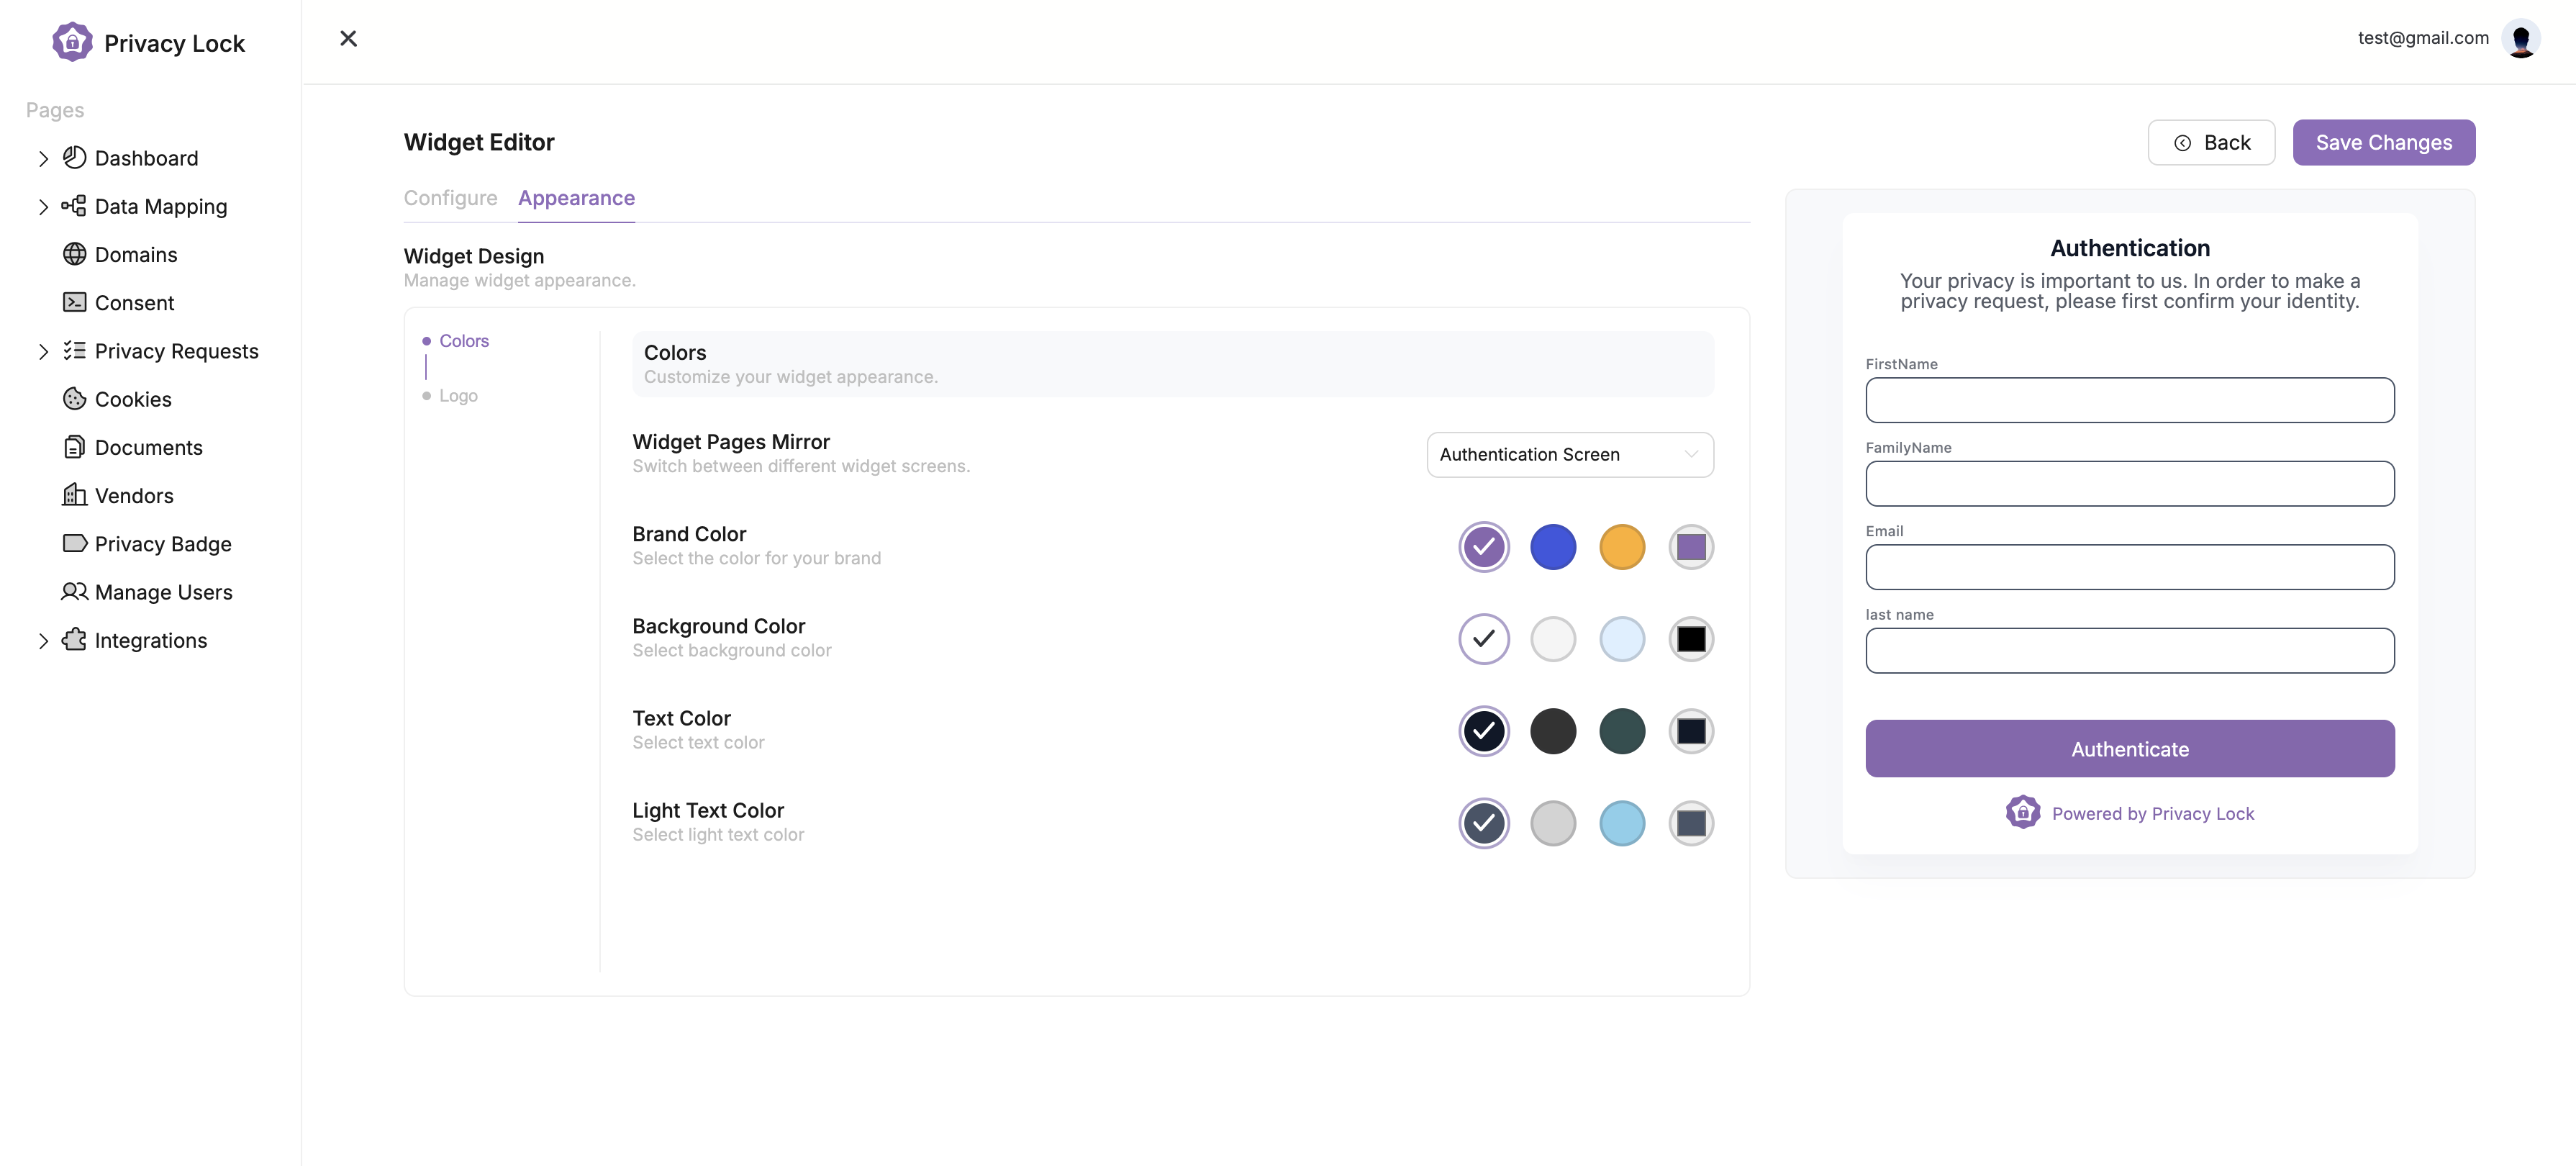
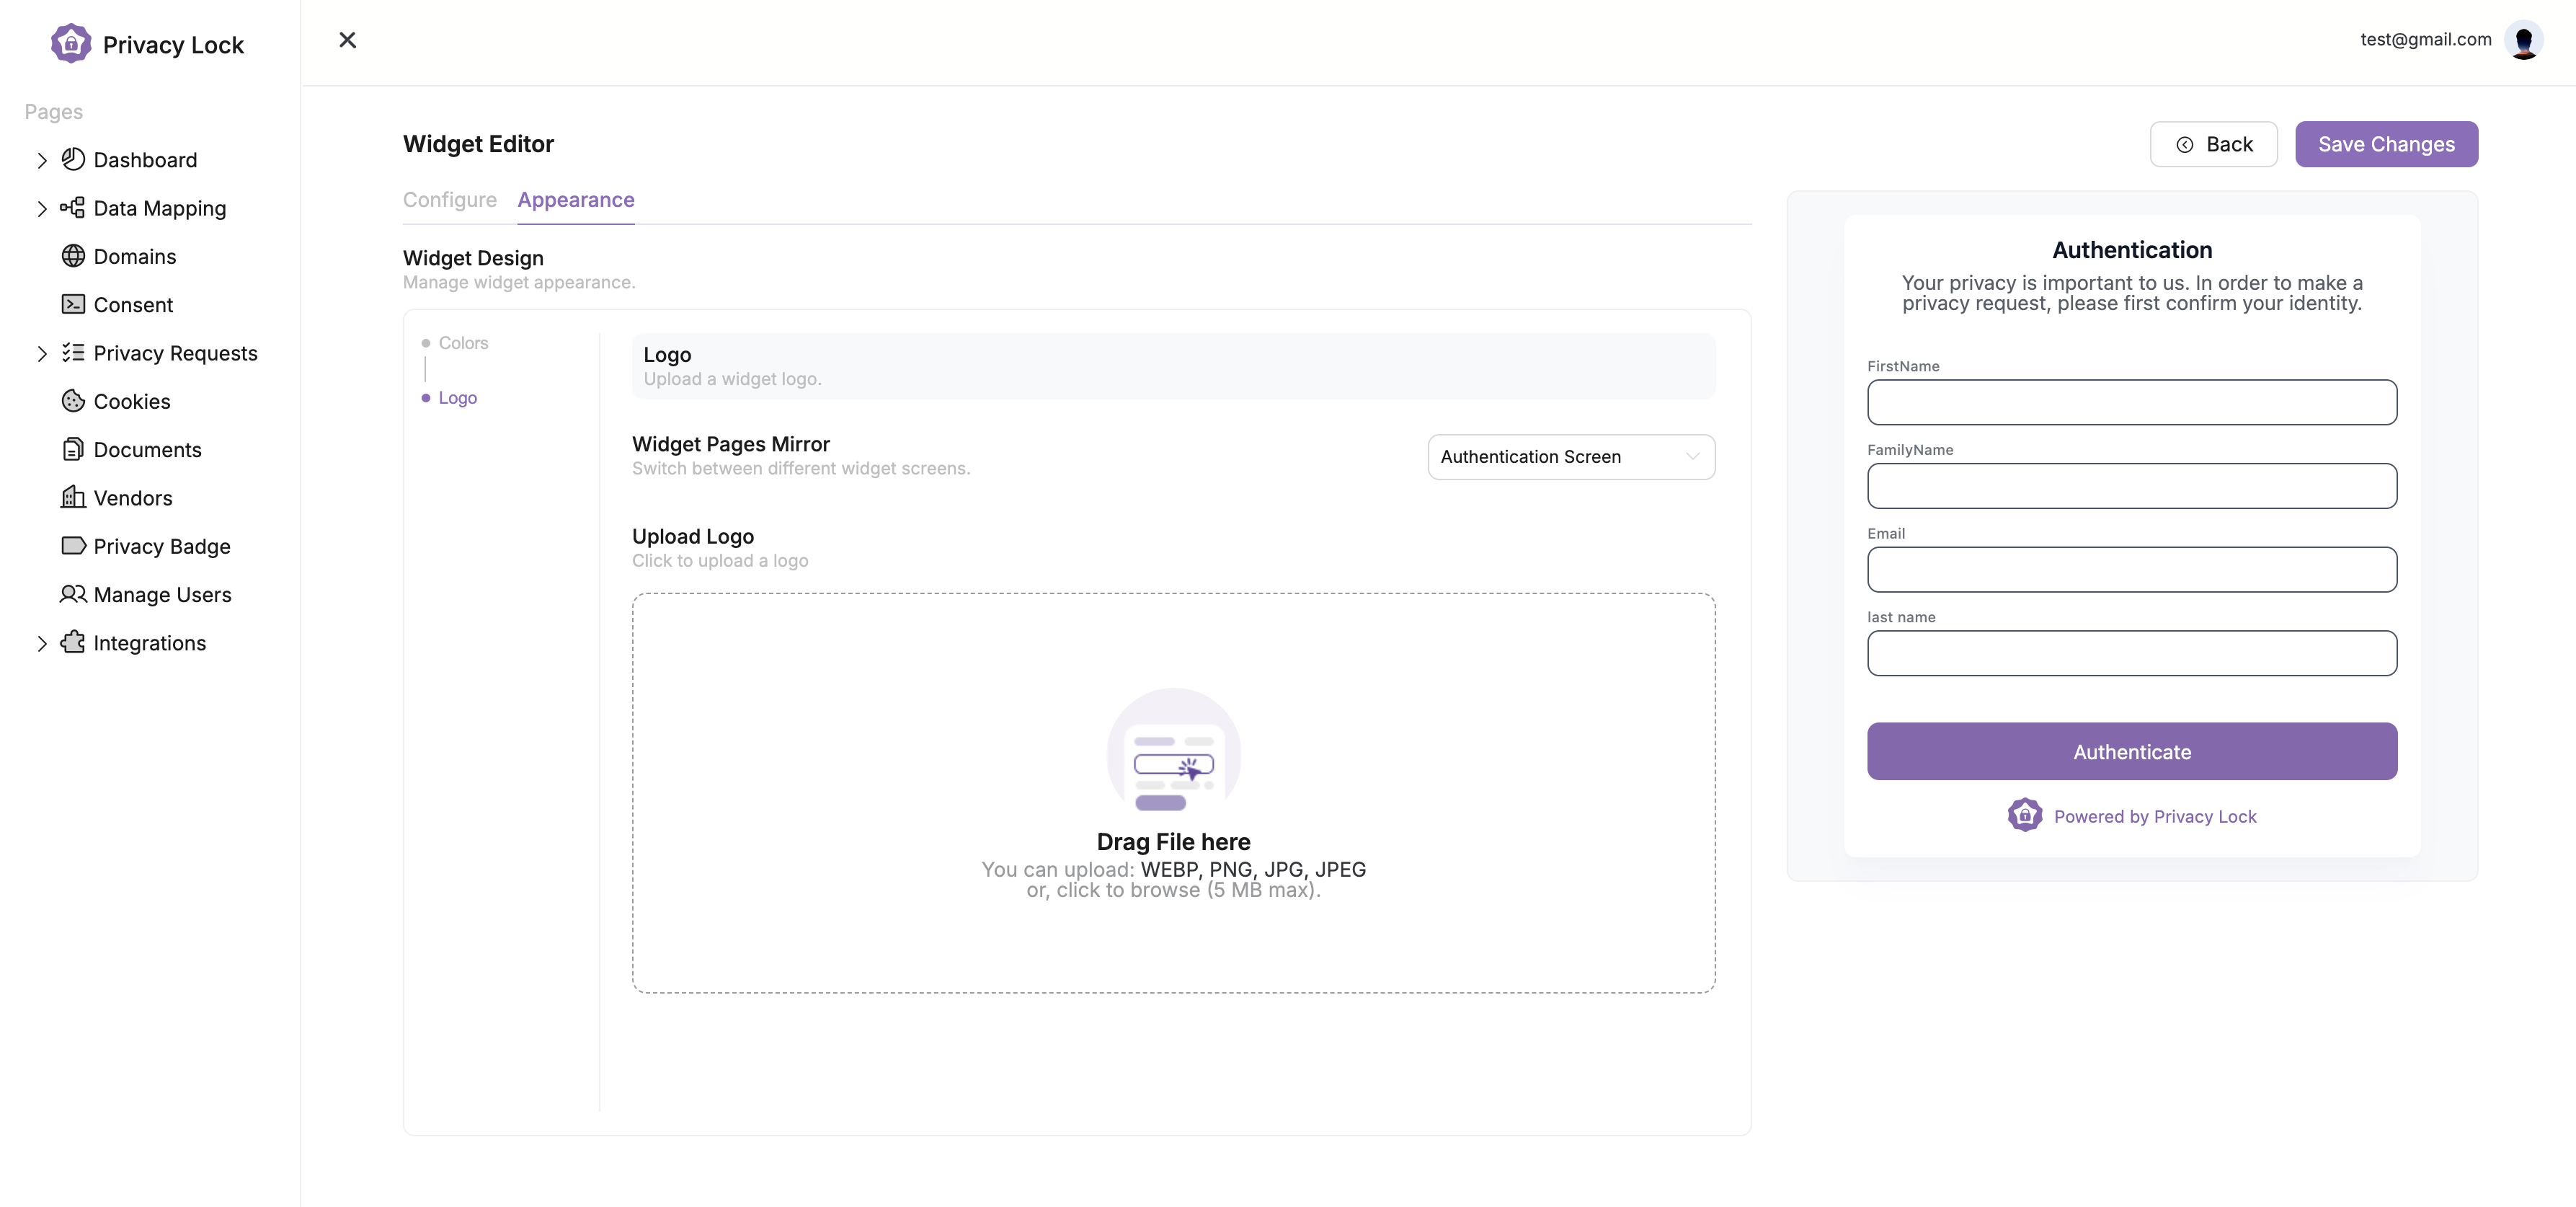
As for customizing the widget to match your website theme and style guide, navigate to the Appearance tab at the top of the widget edditor. This will open the page shown below. From here you can customize the colors of the widget. And upload a logo for the widget as well.
Below is a reference to the Logo edditor. Once you are happy with your widget, select the button in the top right corner labeled Add Widget or Save Widget.
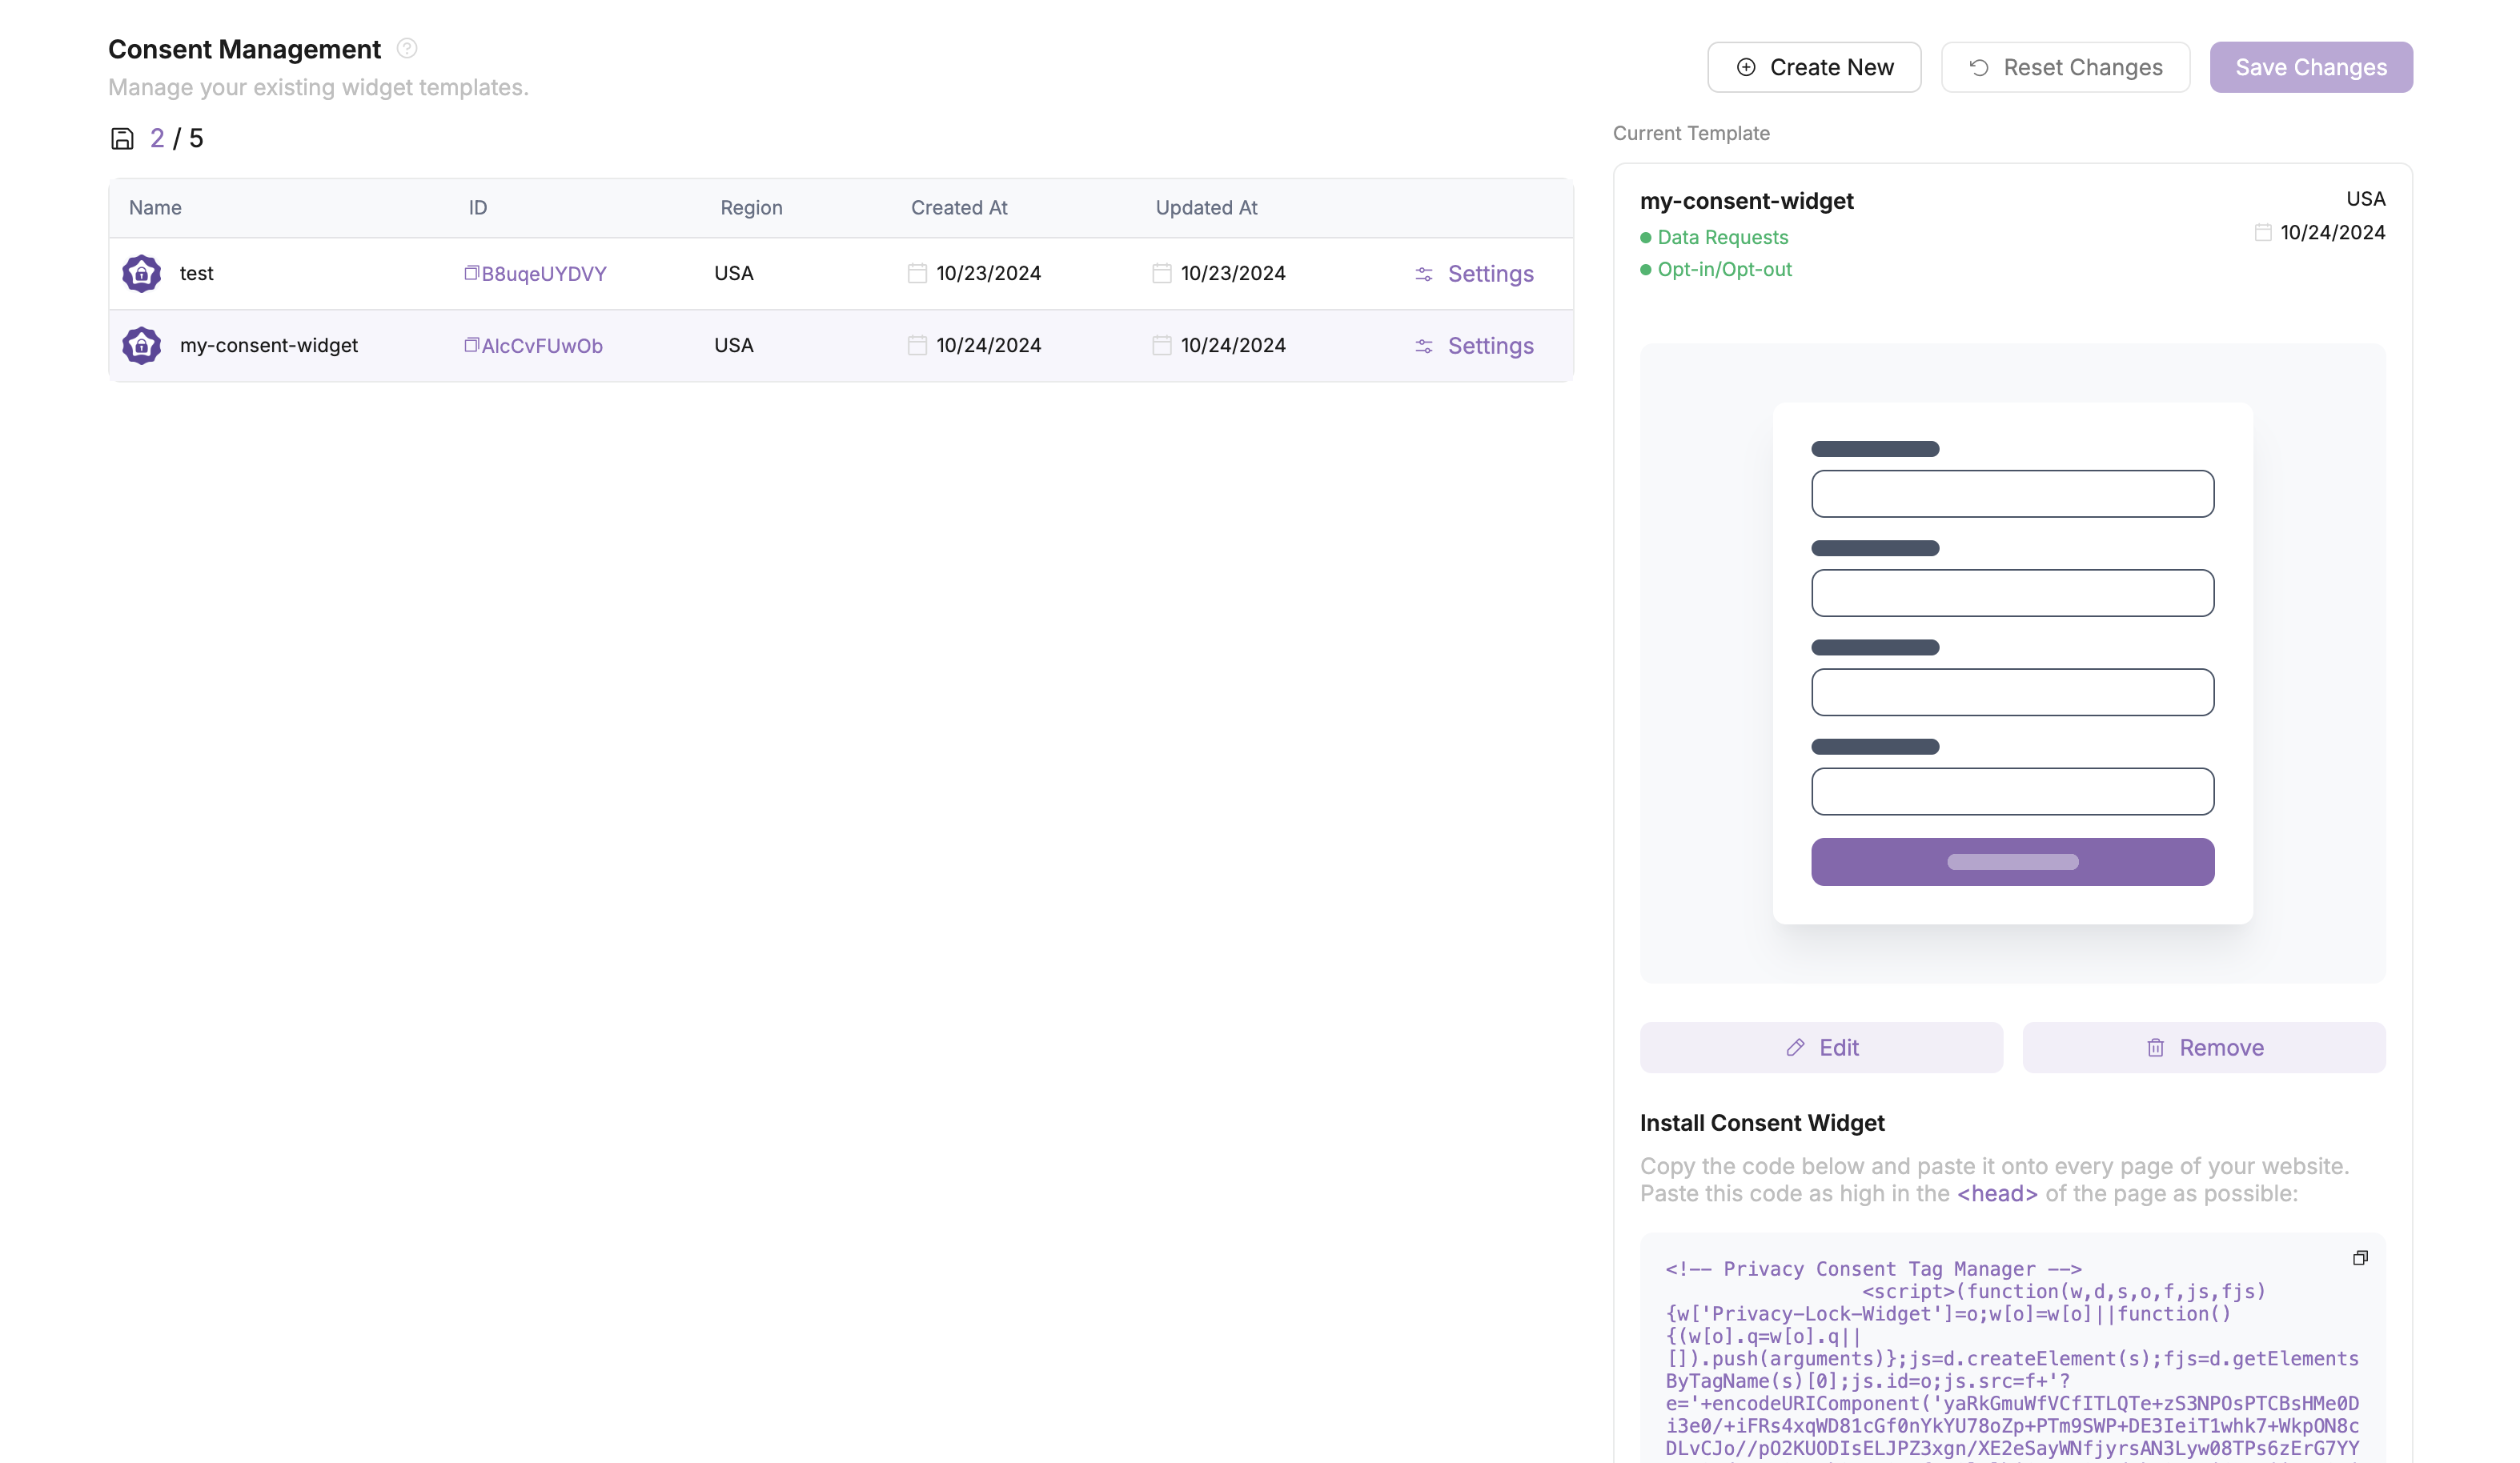
This will navigate you back to the main Consent page, where you can see your new widget. To make changes to the settings, click on the widget, navigate to the right side of the screen, and select the button labeled Edit.
