Cookie Scanner
This page provides an overview of how to operate our cookie scanner.
The cookie scanner is significant because, in order to give the user the right to accept or decline certain cookies, we need to know what cookies your website is tracking.
Create a Scan
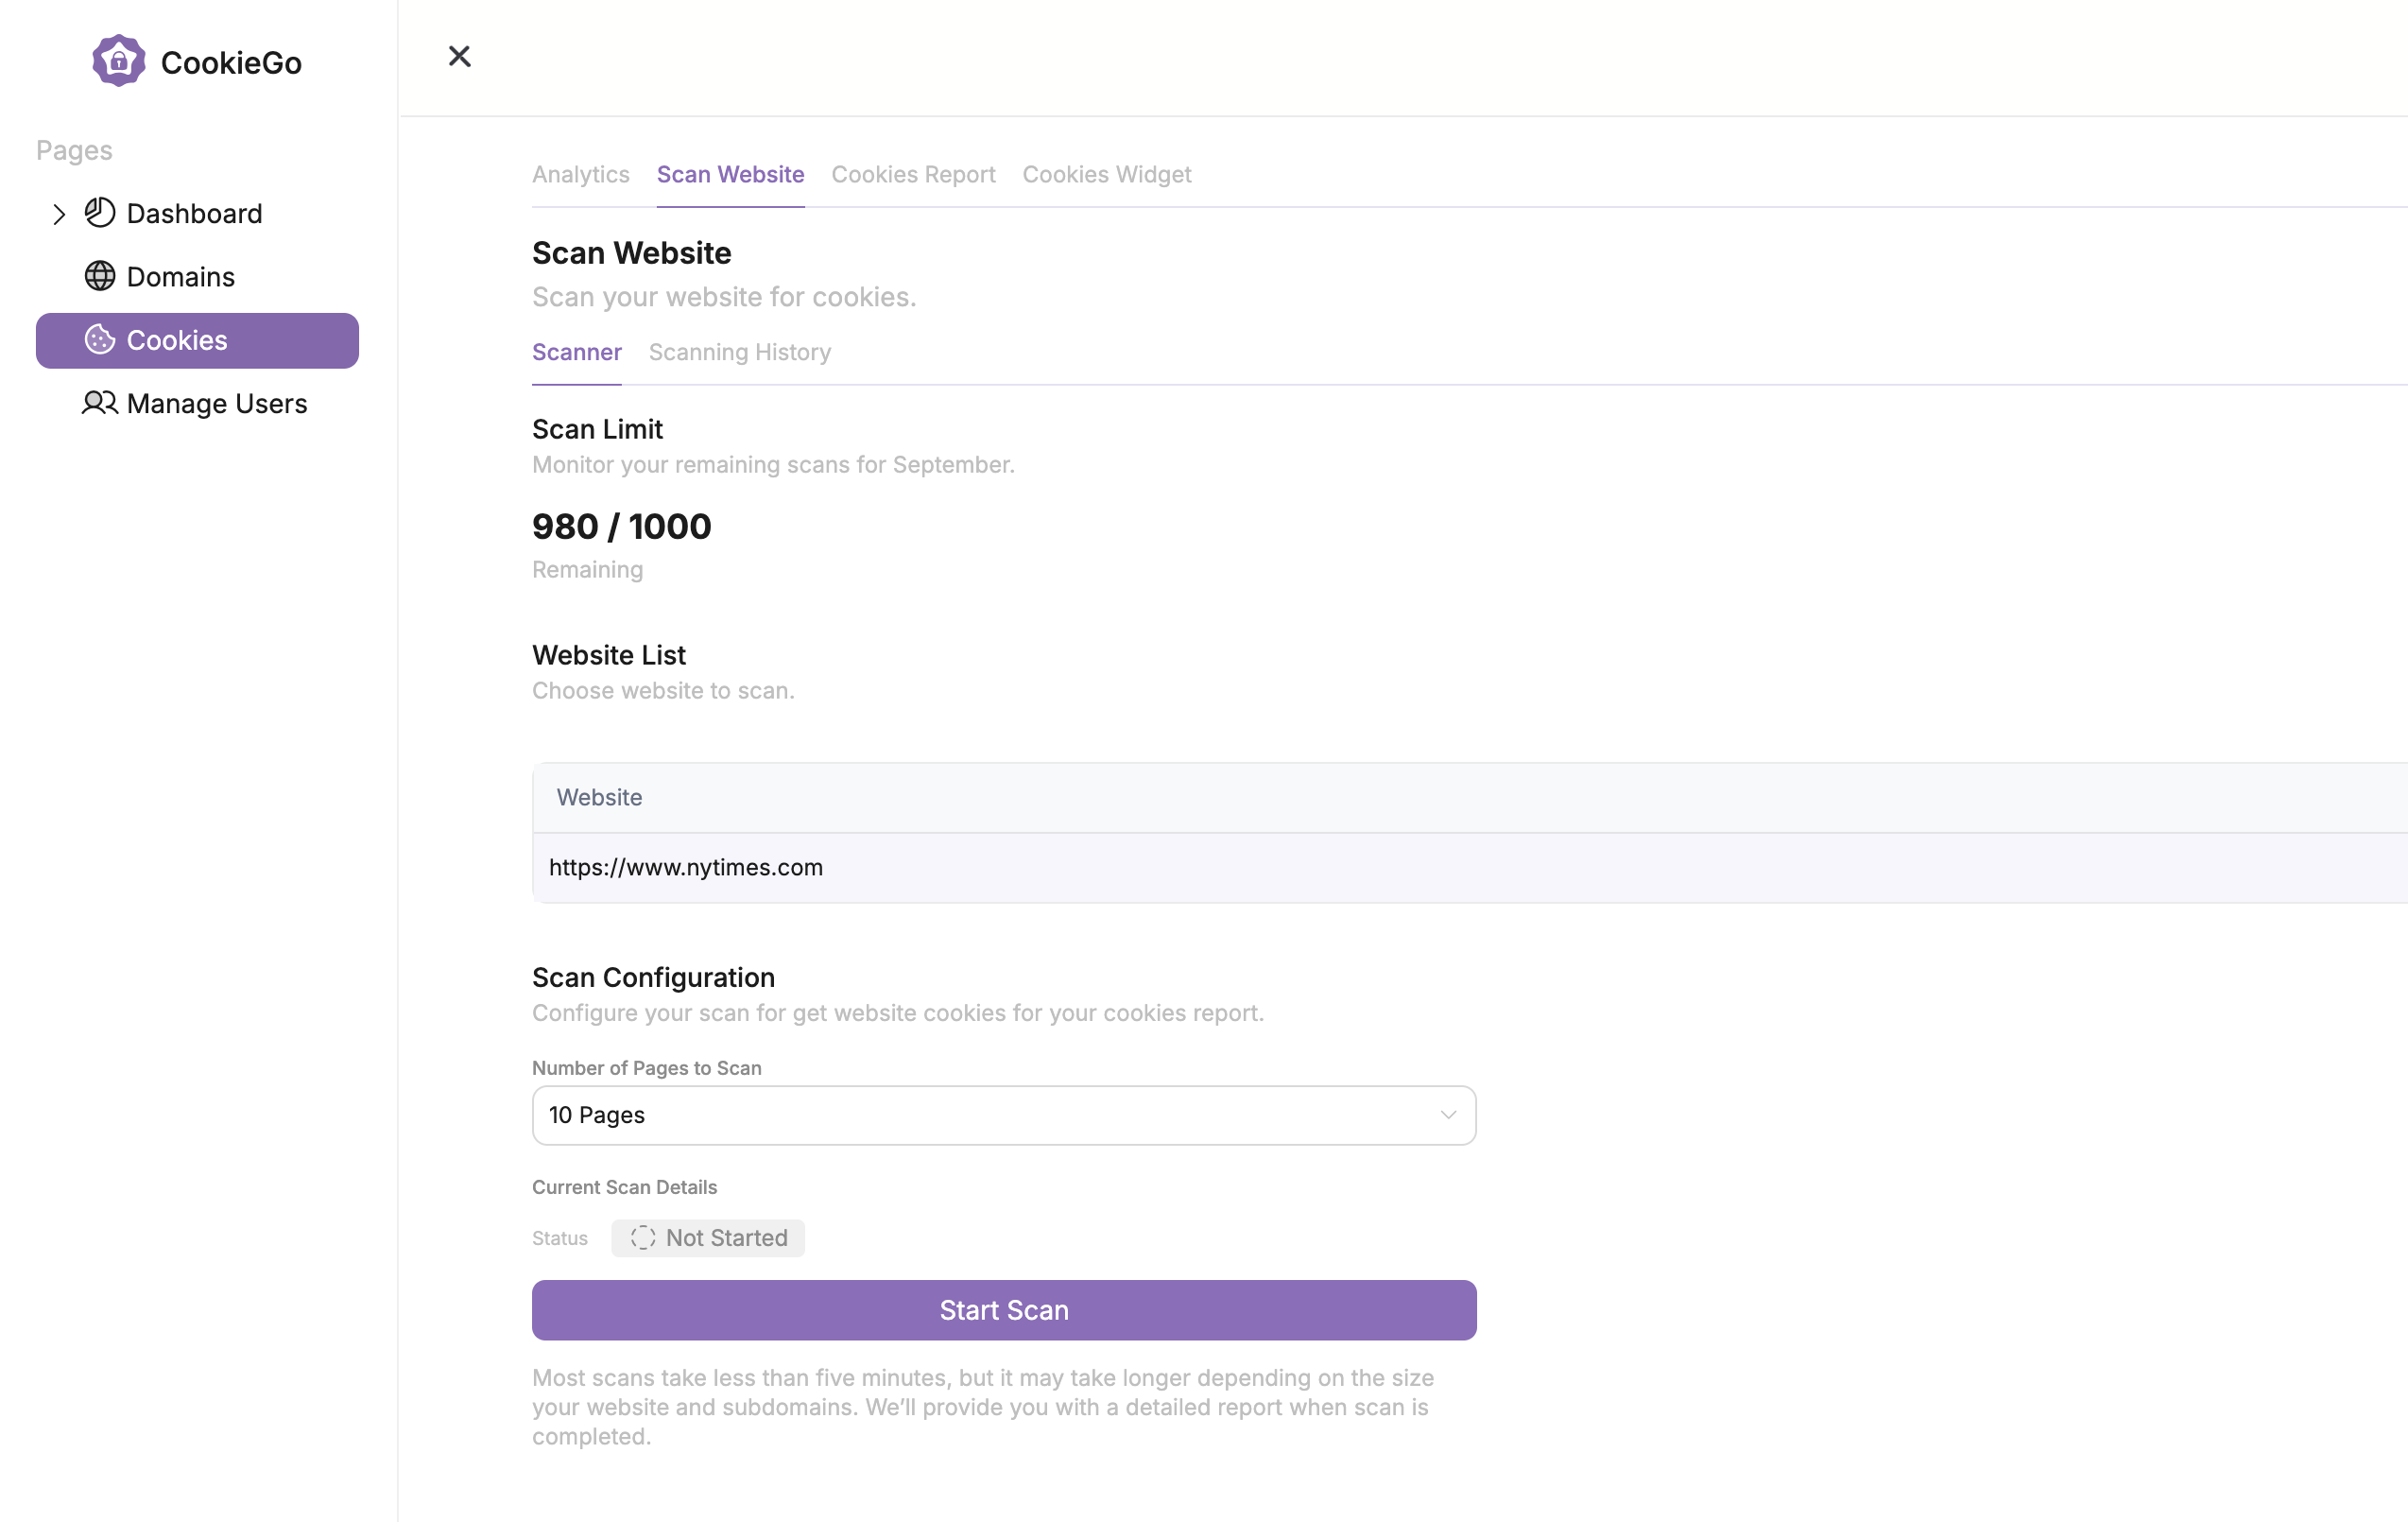
Navigate to the cookies tab, select Scan Website as seen in the image below. Then we will click on the verified domain and select Start Scan.
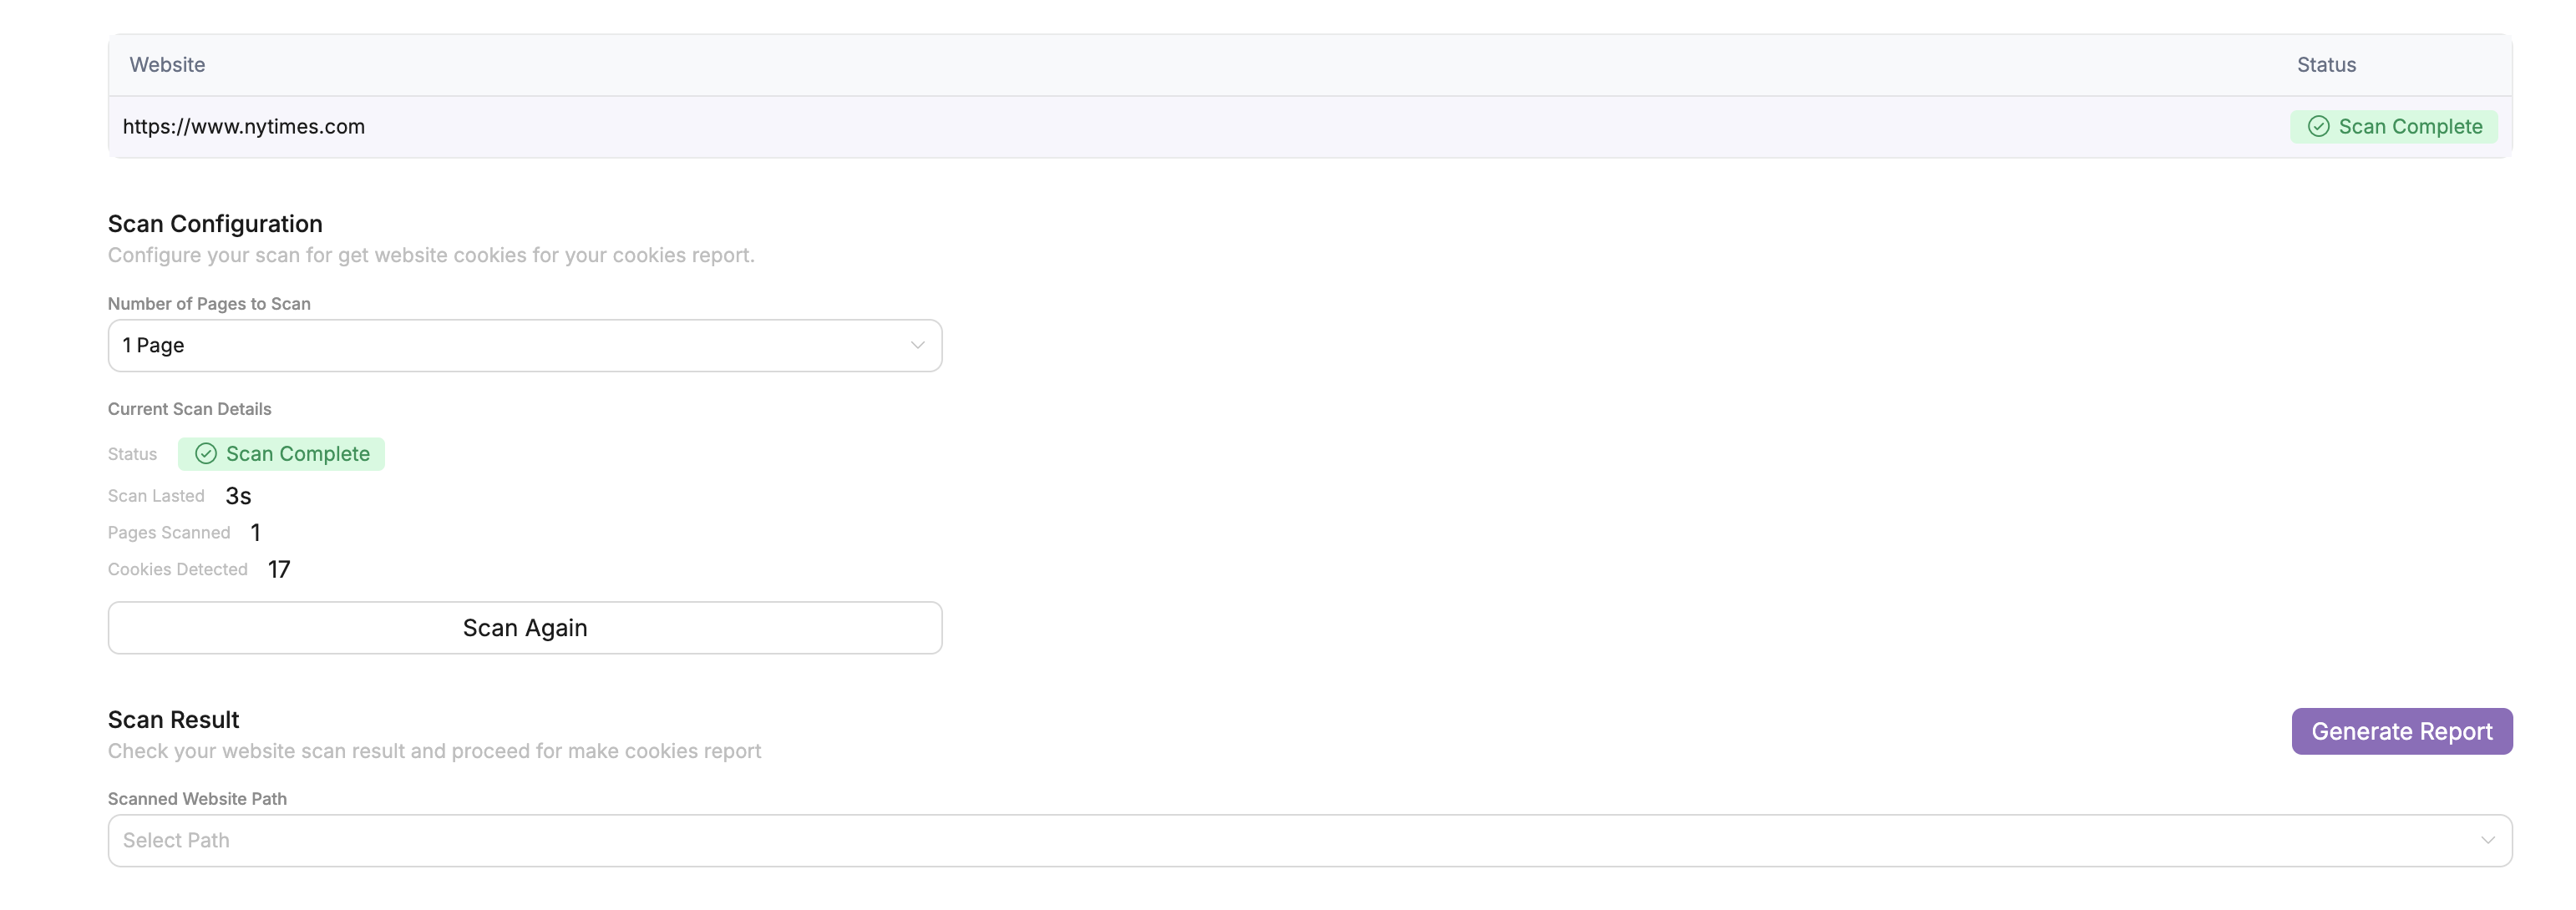
Once the scan is complete you will see an output like the one shown below. This means your scan is complete.
A completed scan will show you certain information, including scan time, pages scanned, and cookies detected. Now you can generate a report. From this page, click on Generate Report.
Viewing Report & Metrics
To view your cookie report, select the cookies tab on the left side of the page and then navigate to Cookies Report. From this page you can examine the results of each scan and review how all of your cookies have been classified.
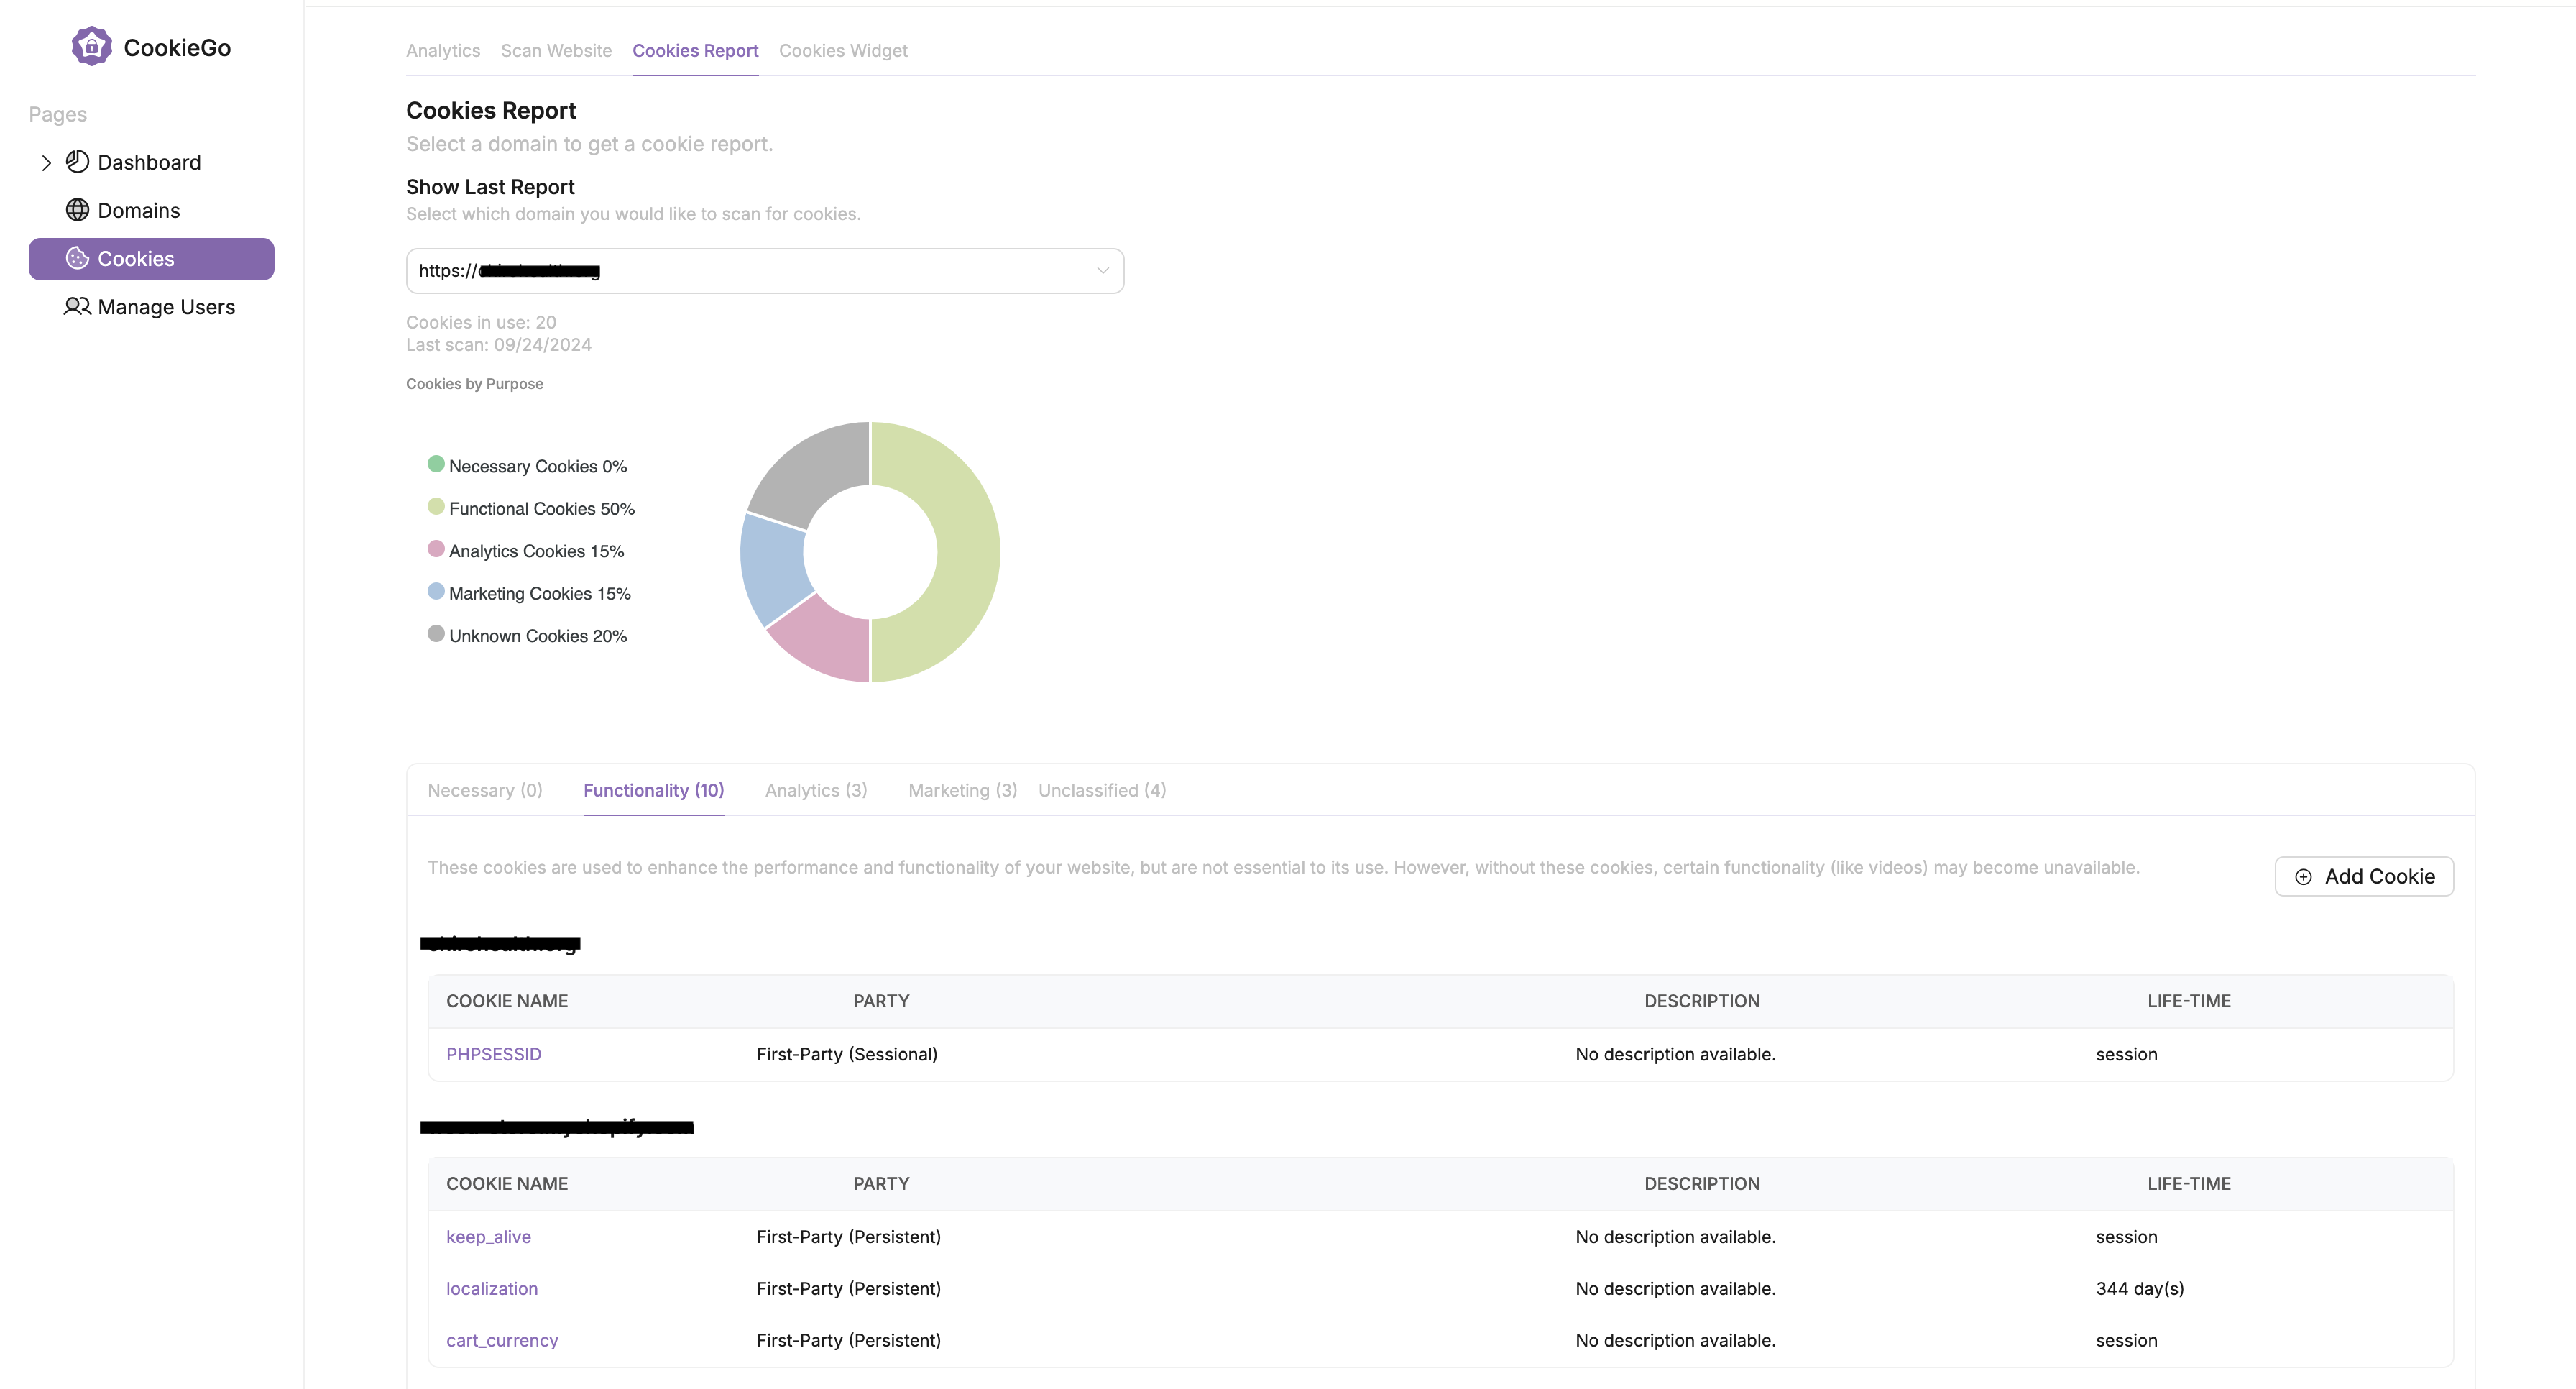
In the report page you will be able to see specific metrics from your cookies scan. The CookieGo scanner provides metrics on the number of cookies detected, whether cookies are first or third-party cookies, and the classification of cookies (ie. Marketing, Functionality, etc.).
You may want to review specific report metrics and re-classify cookies. These subjects are addressed in the following sections.
Cookie Classification
Some cookie classifications may be incomplete or they may reflect the incorrect processing purpose. In this case you can re-classify cookies. In particular, it is important to identify which cookies are strictly necessary for your website to function properly. Strictly necessary cookies generally do not allow users to opt-out, however they must comply with applicable rules and regulations.
If you would like to manually update the classification of a cookie, click on the cookie you would like to edit. From there you will see a cookie form like the one below. Once you are done making changes, just click on Save and return to the scan report metrics.
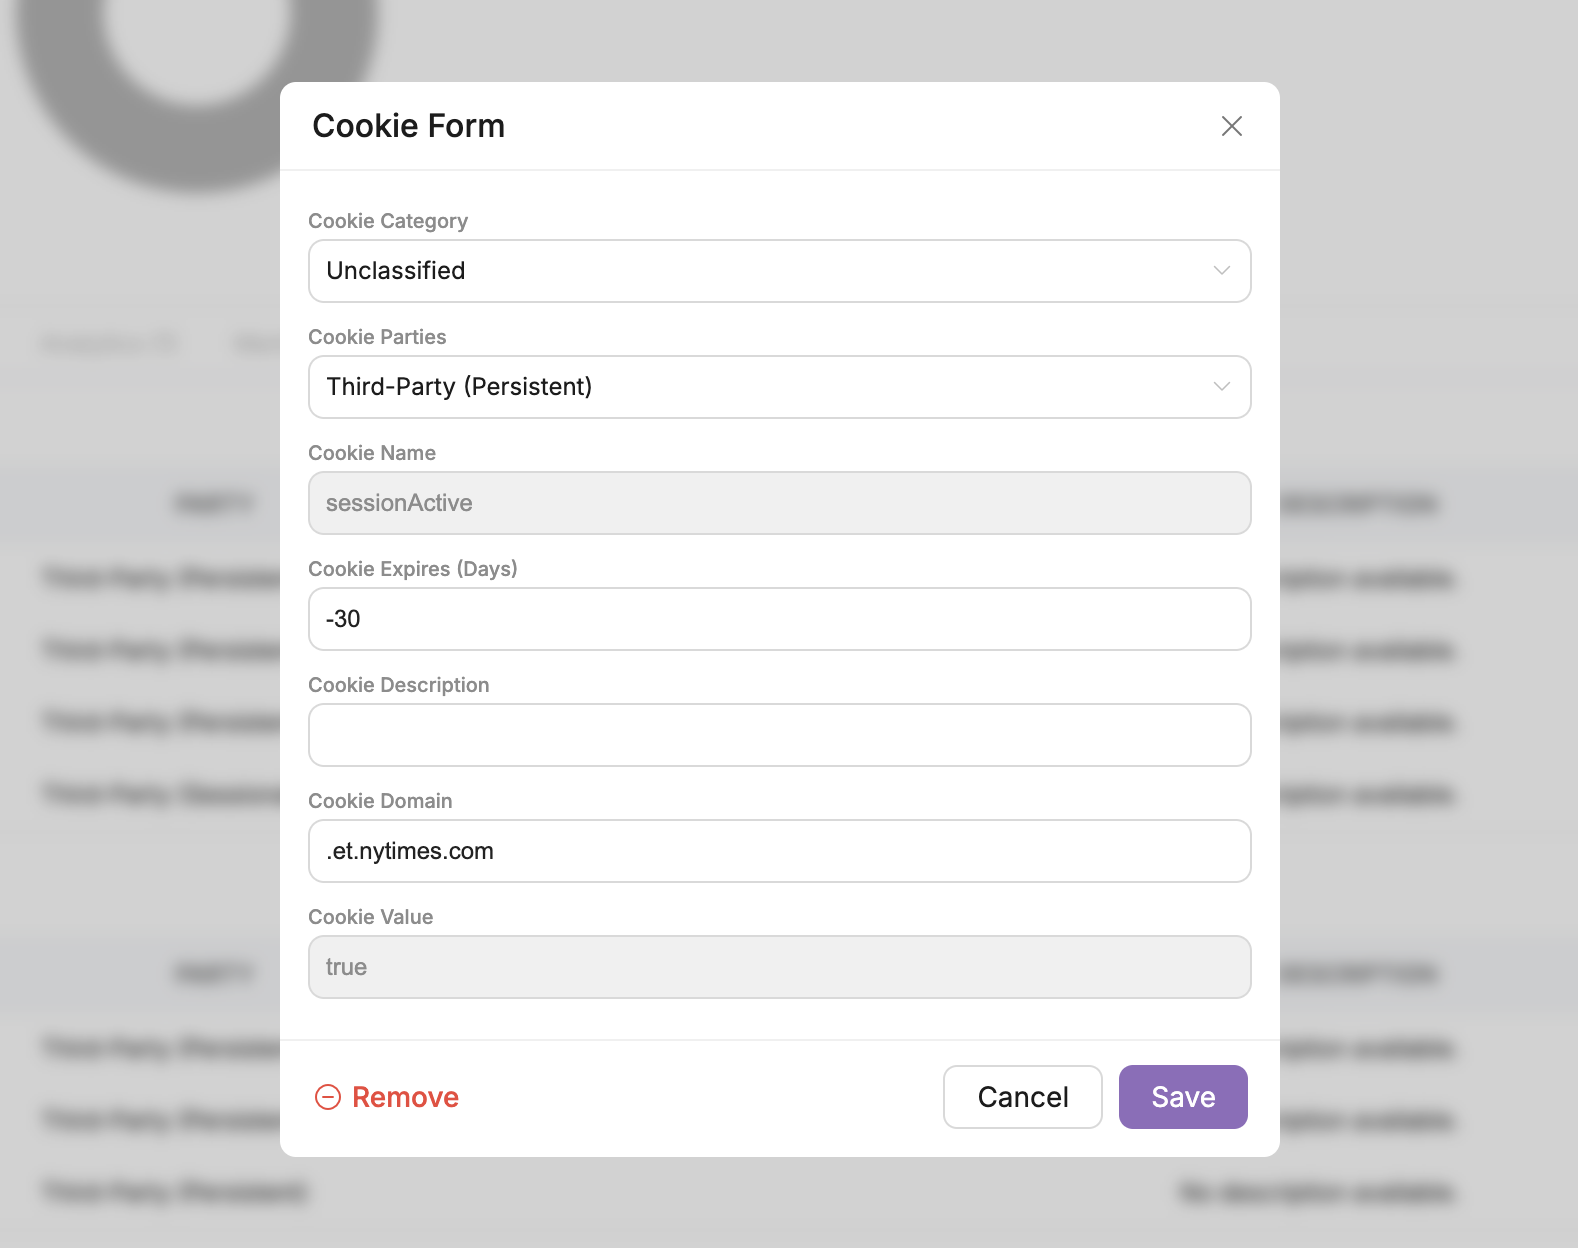
Below is an exapmle of how to reclassify a cookie. In this case, it is unclassified. To make a change, just select the appropriate classification and save the change.
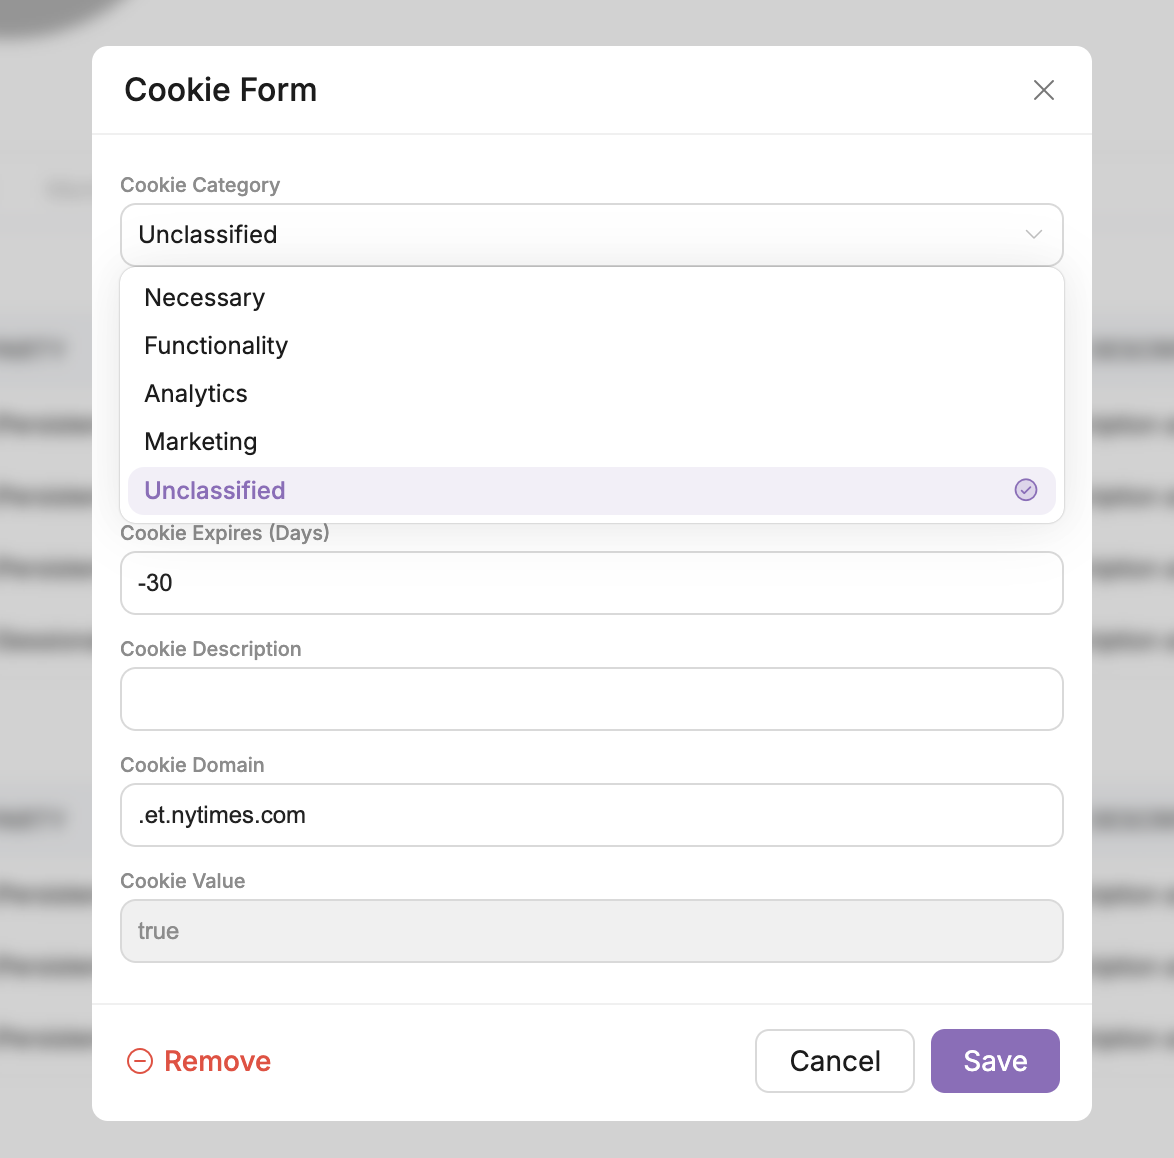
When you change the Cookie Classification that cookie will automatically move to the classification category you have selected (ie. Necessary, Functionality, Analytics, etc.). When users make consent requests about cookie categories, the cookies under that classification category will be impacted.
Scanning History
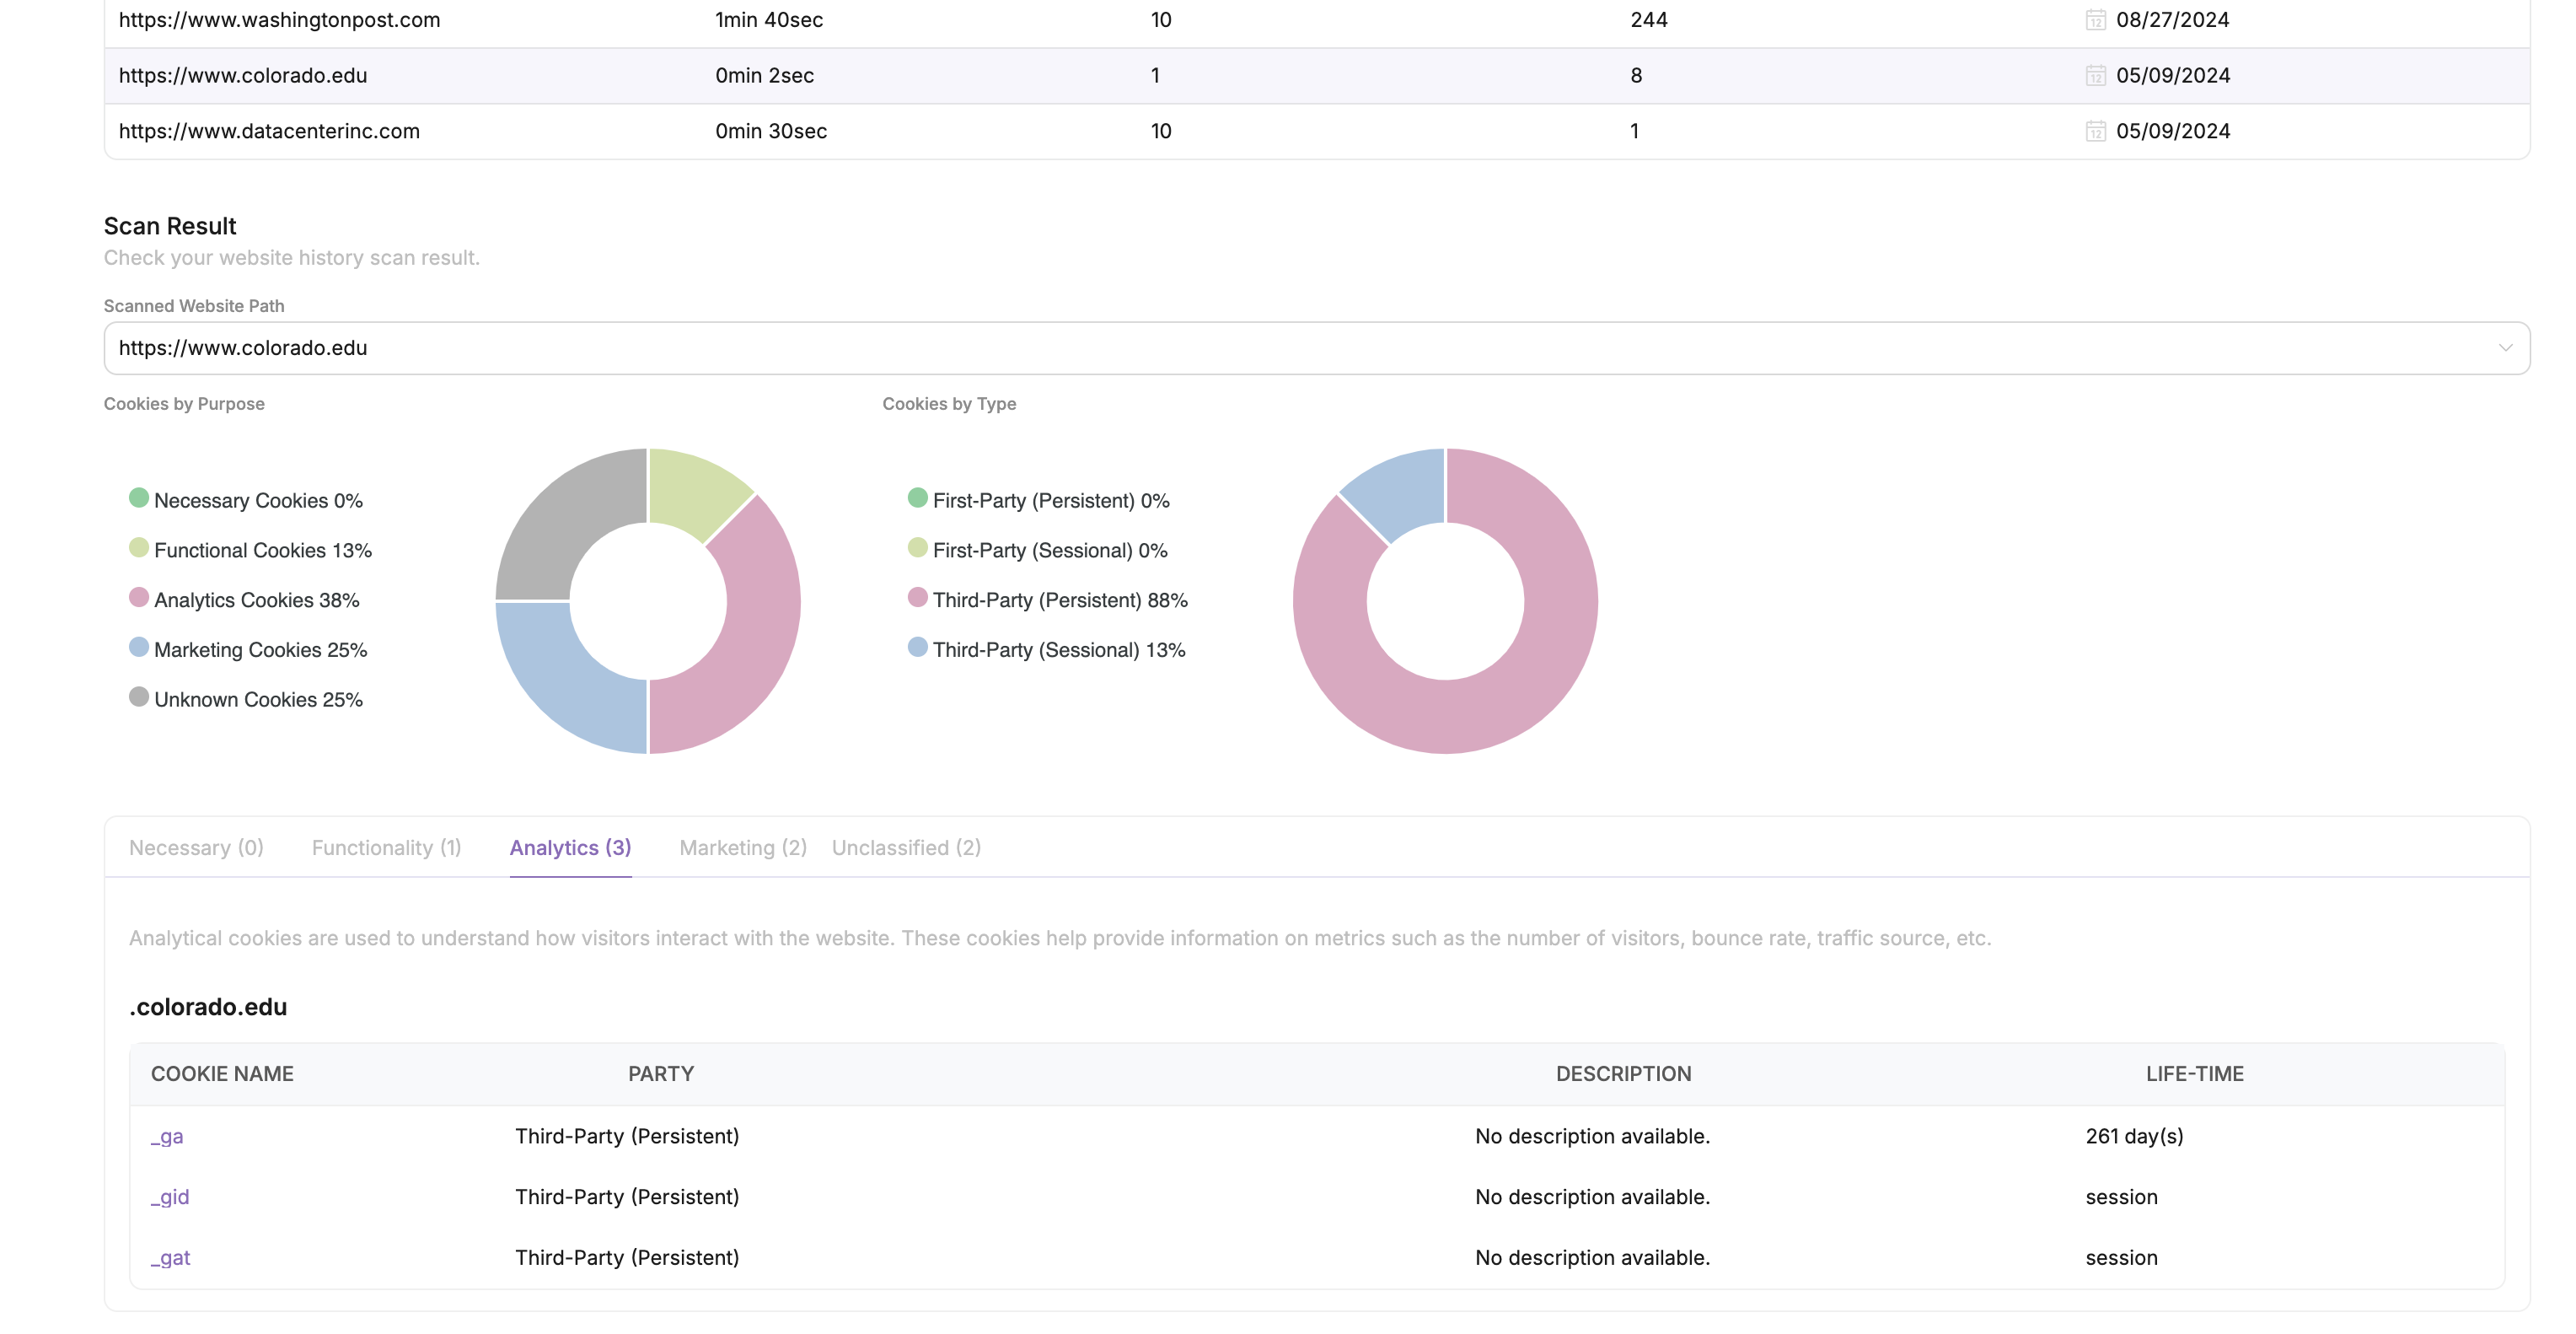
To view your scanning history, please navigate to the Cookies > Scan Website tab. From here, select the toggle to Scanning History as seen below. This will show a log of all your cookie scans and allow you to click on a specific scan and review the results.

To view the results of a certain scan, click on the entry in the table and select a Path. This will open up the data from that scan, as seen below.
